Jira integration
Nanitor offers the ability to connect your Jira Cloud instance with Nanitor. This enables you to push issues detected by Nanitor directly into your Jira instance. Jira is often used by IT teams to manage and provide all kinds of IT services. Adding security issues for resolution to your Jira environment is an efficient way to remediate IT security risks. Nanitor can act as the tool to view, prioritize, and decide on detected security risks that will then be sent to an IT team to resolve.
This article describes the setup of the connection between Jira and Nanitor and its functionality and use cases once the integration is up and running.
Jira developer app
The communication between Nanitor and Jira is handled by a developer application (app) from Jira. Nanitor will communicate with this app, exchange the credentials for authorization, and retrieve the necessary information from Jira about existing Jira projects, issue types, etc. The Jira application needs to be set up by a Jira administrator. Once the app is setup you will need to enter the provided client_id and secret_id from Jira into Nanitor to establish and verify the connection.
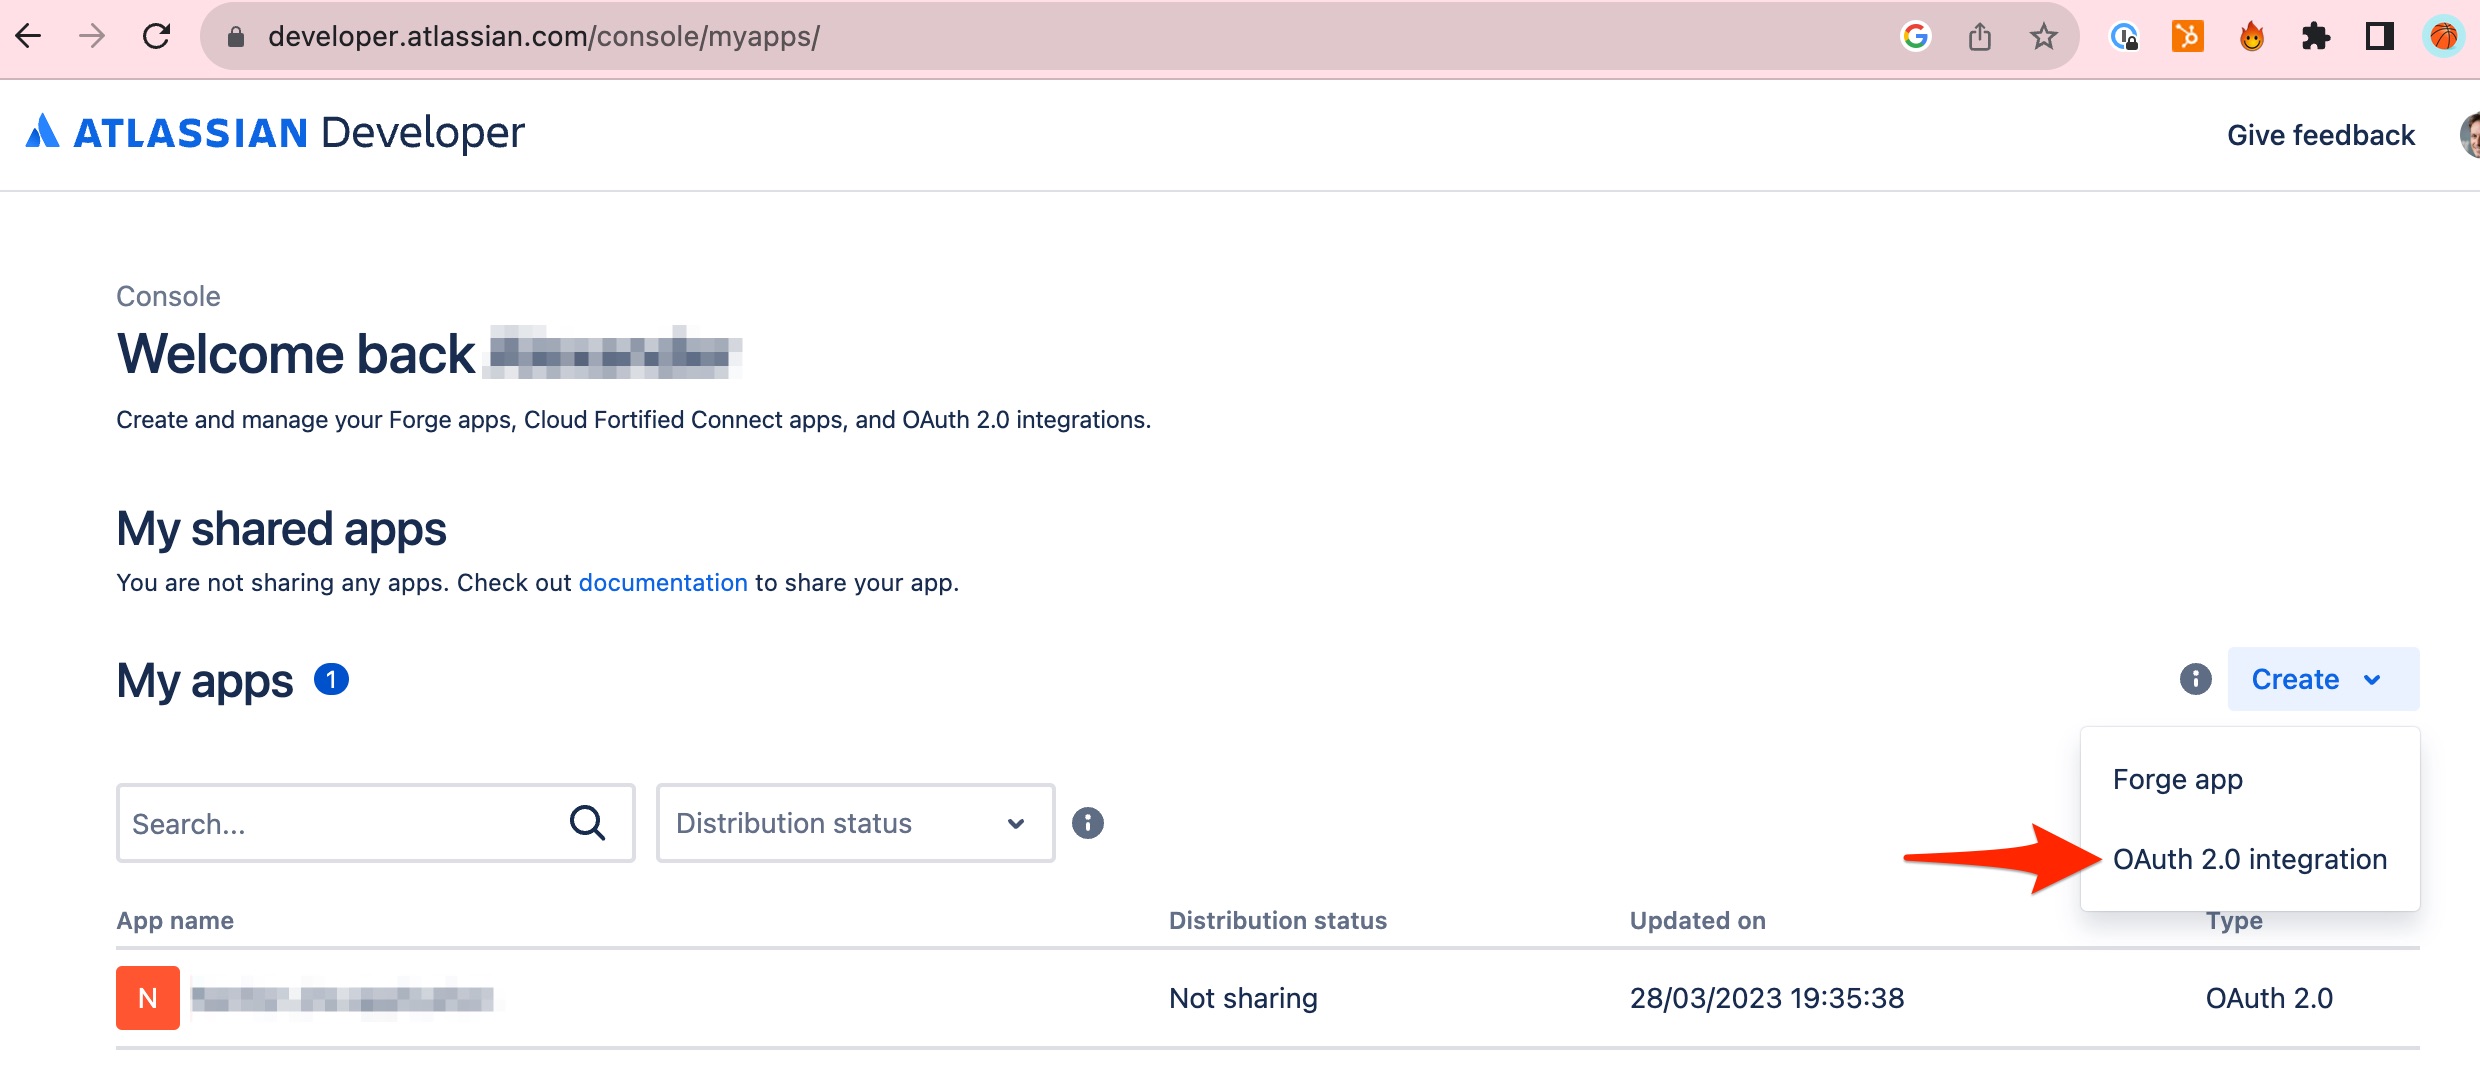
To create a Jira application, navigate to the Jira developer console. Once there, click the create button and select the OAuth 2.0 integration option to get started with your app.
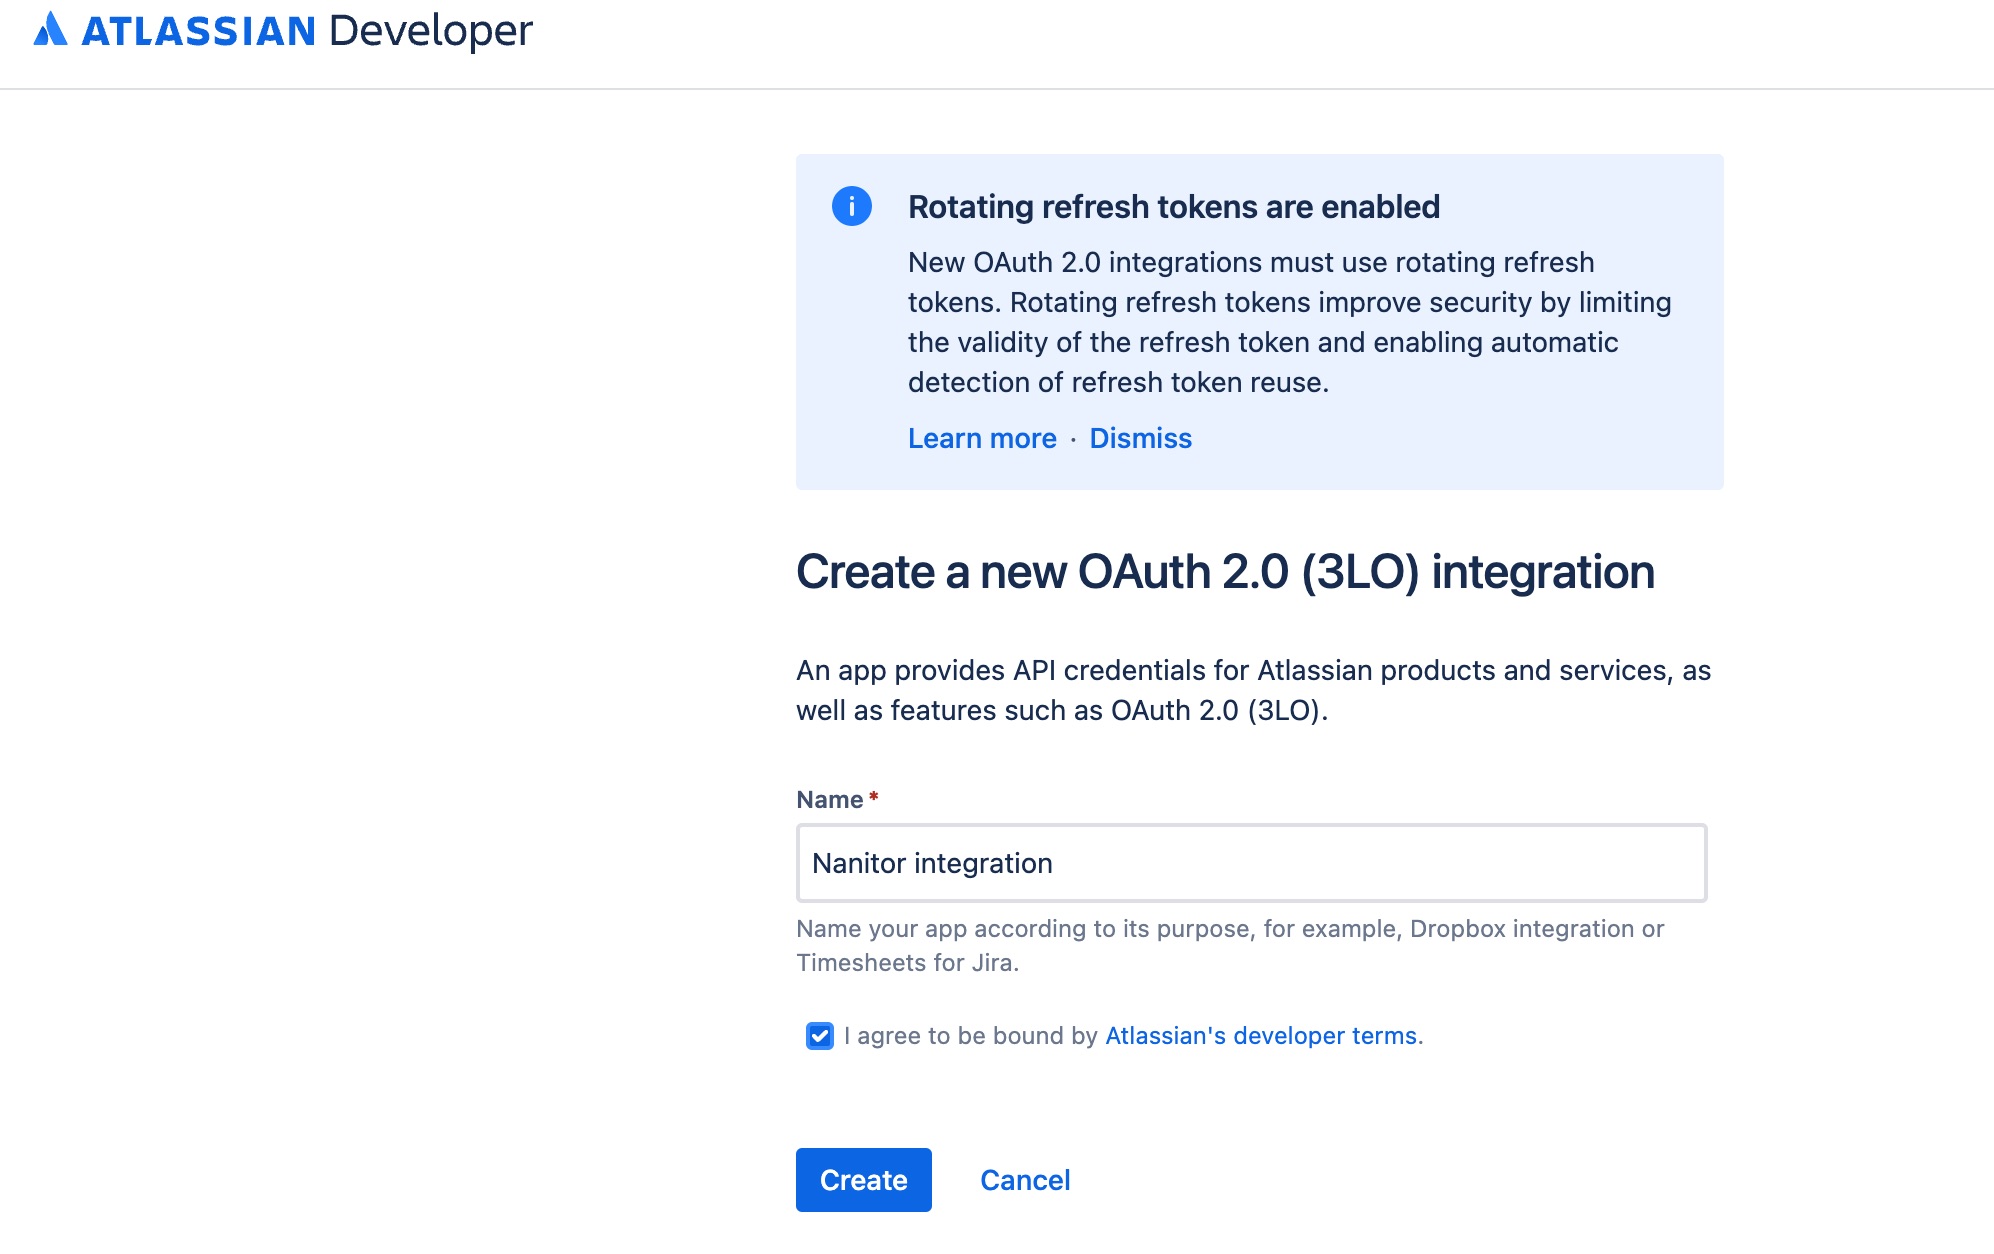
On the next screen, choose a descriptive name, confirm the terms, and click the Create button.
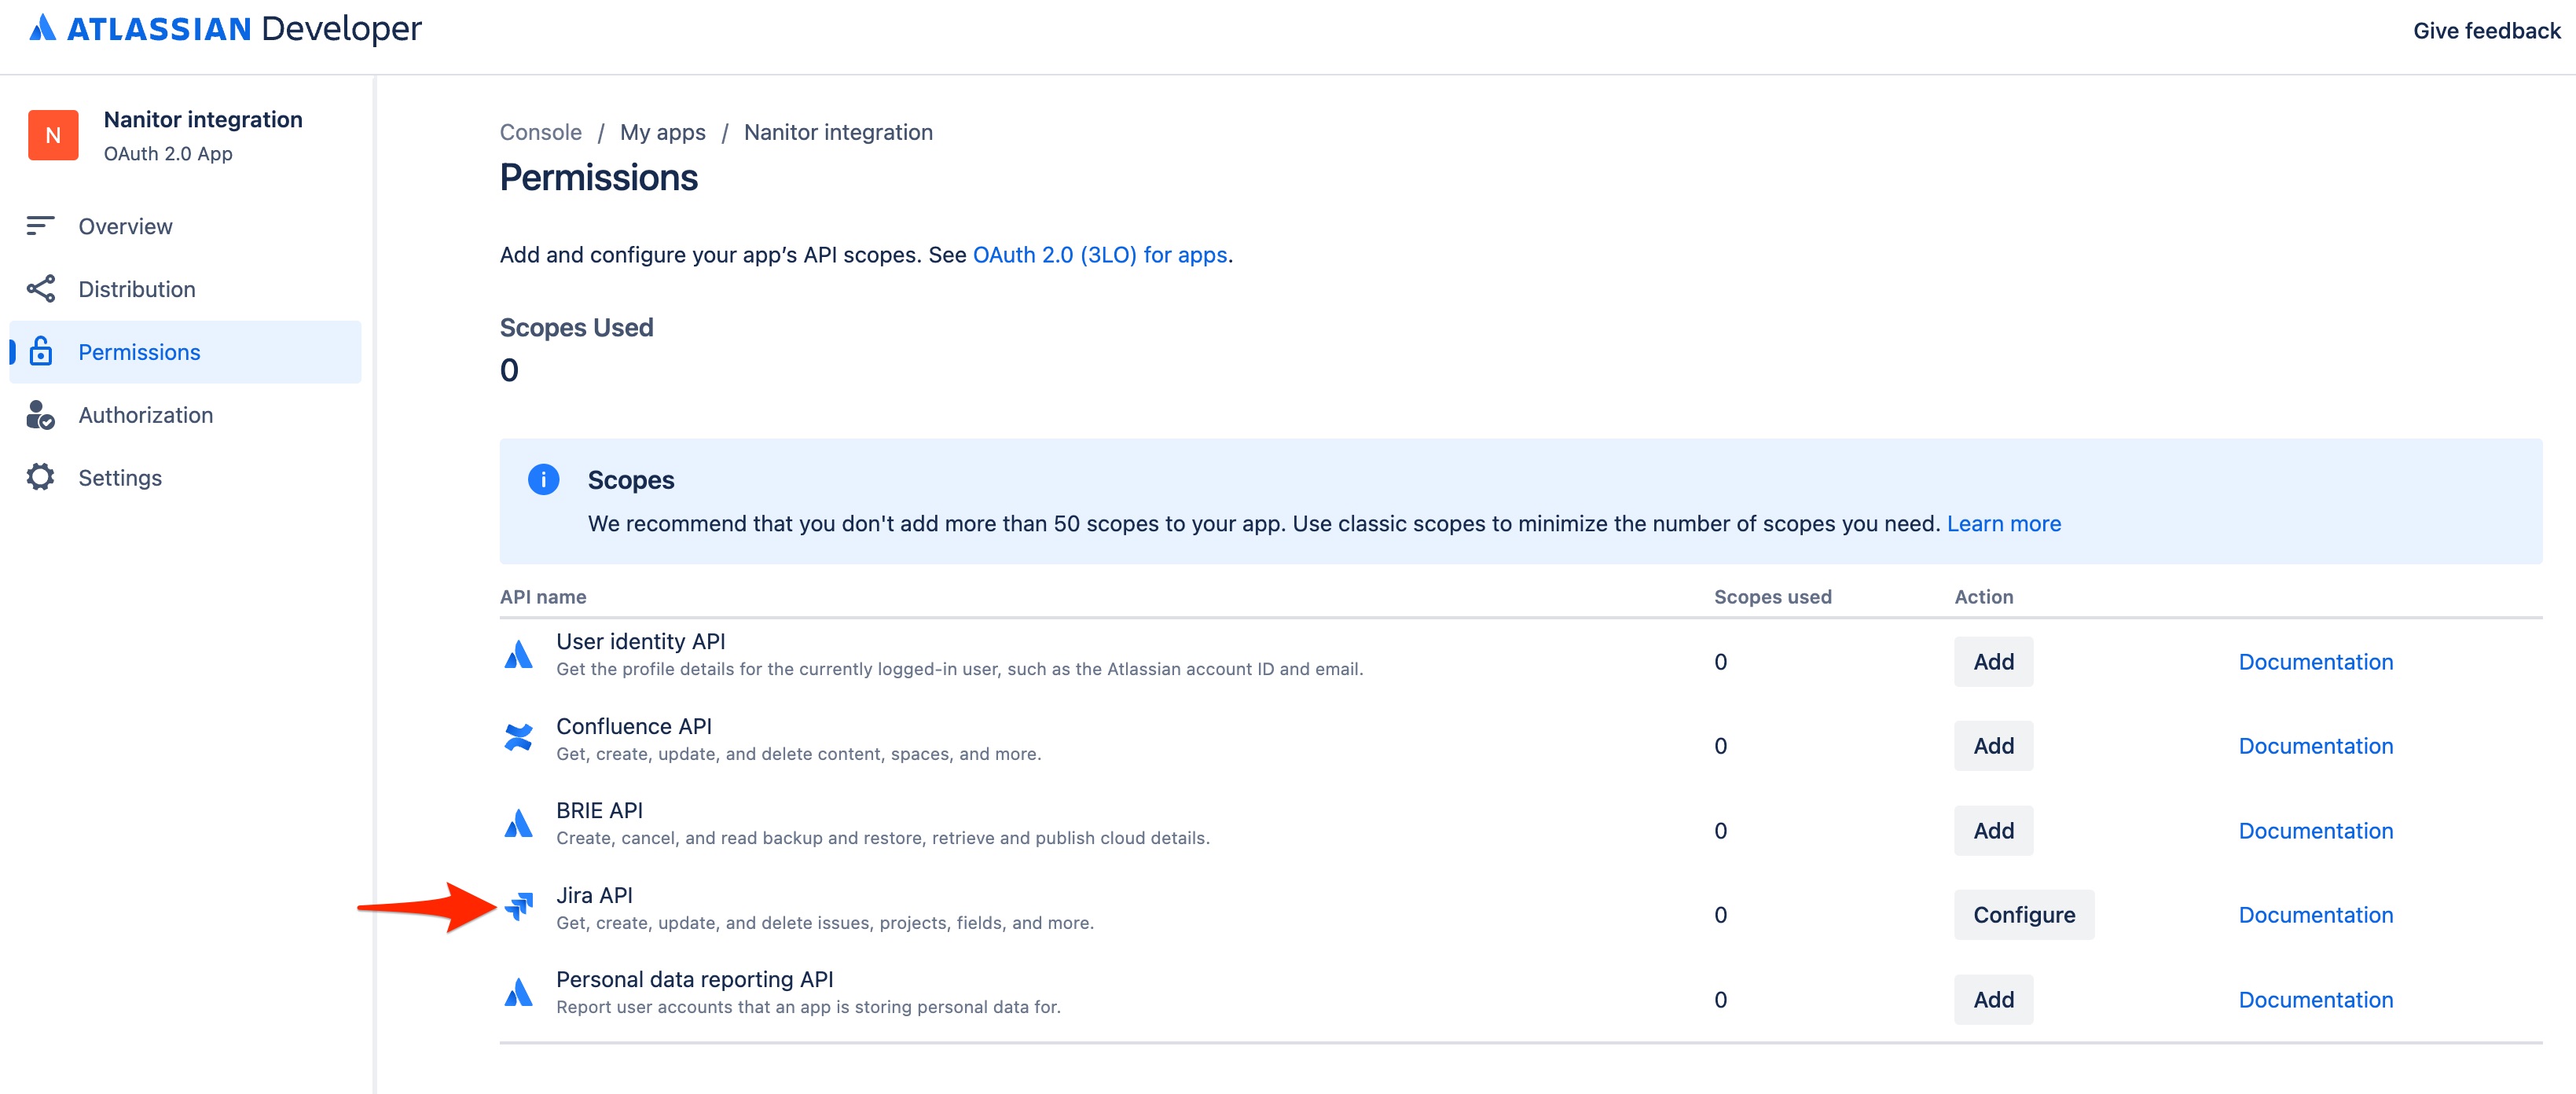
In the permissions tab of the application, allow access to the Jira API.
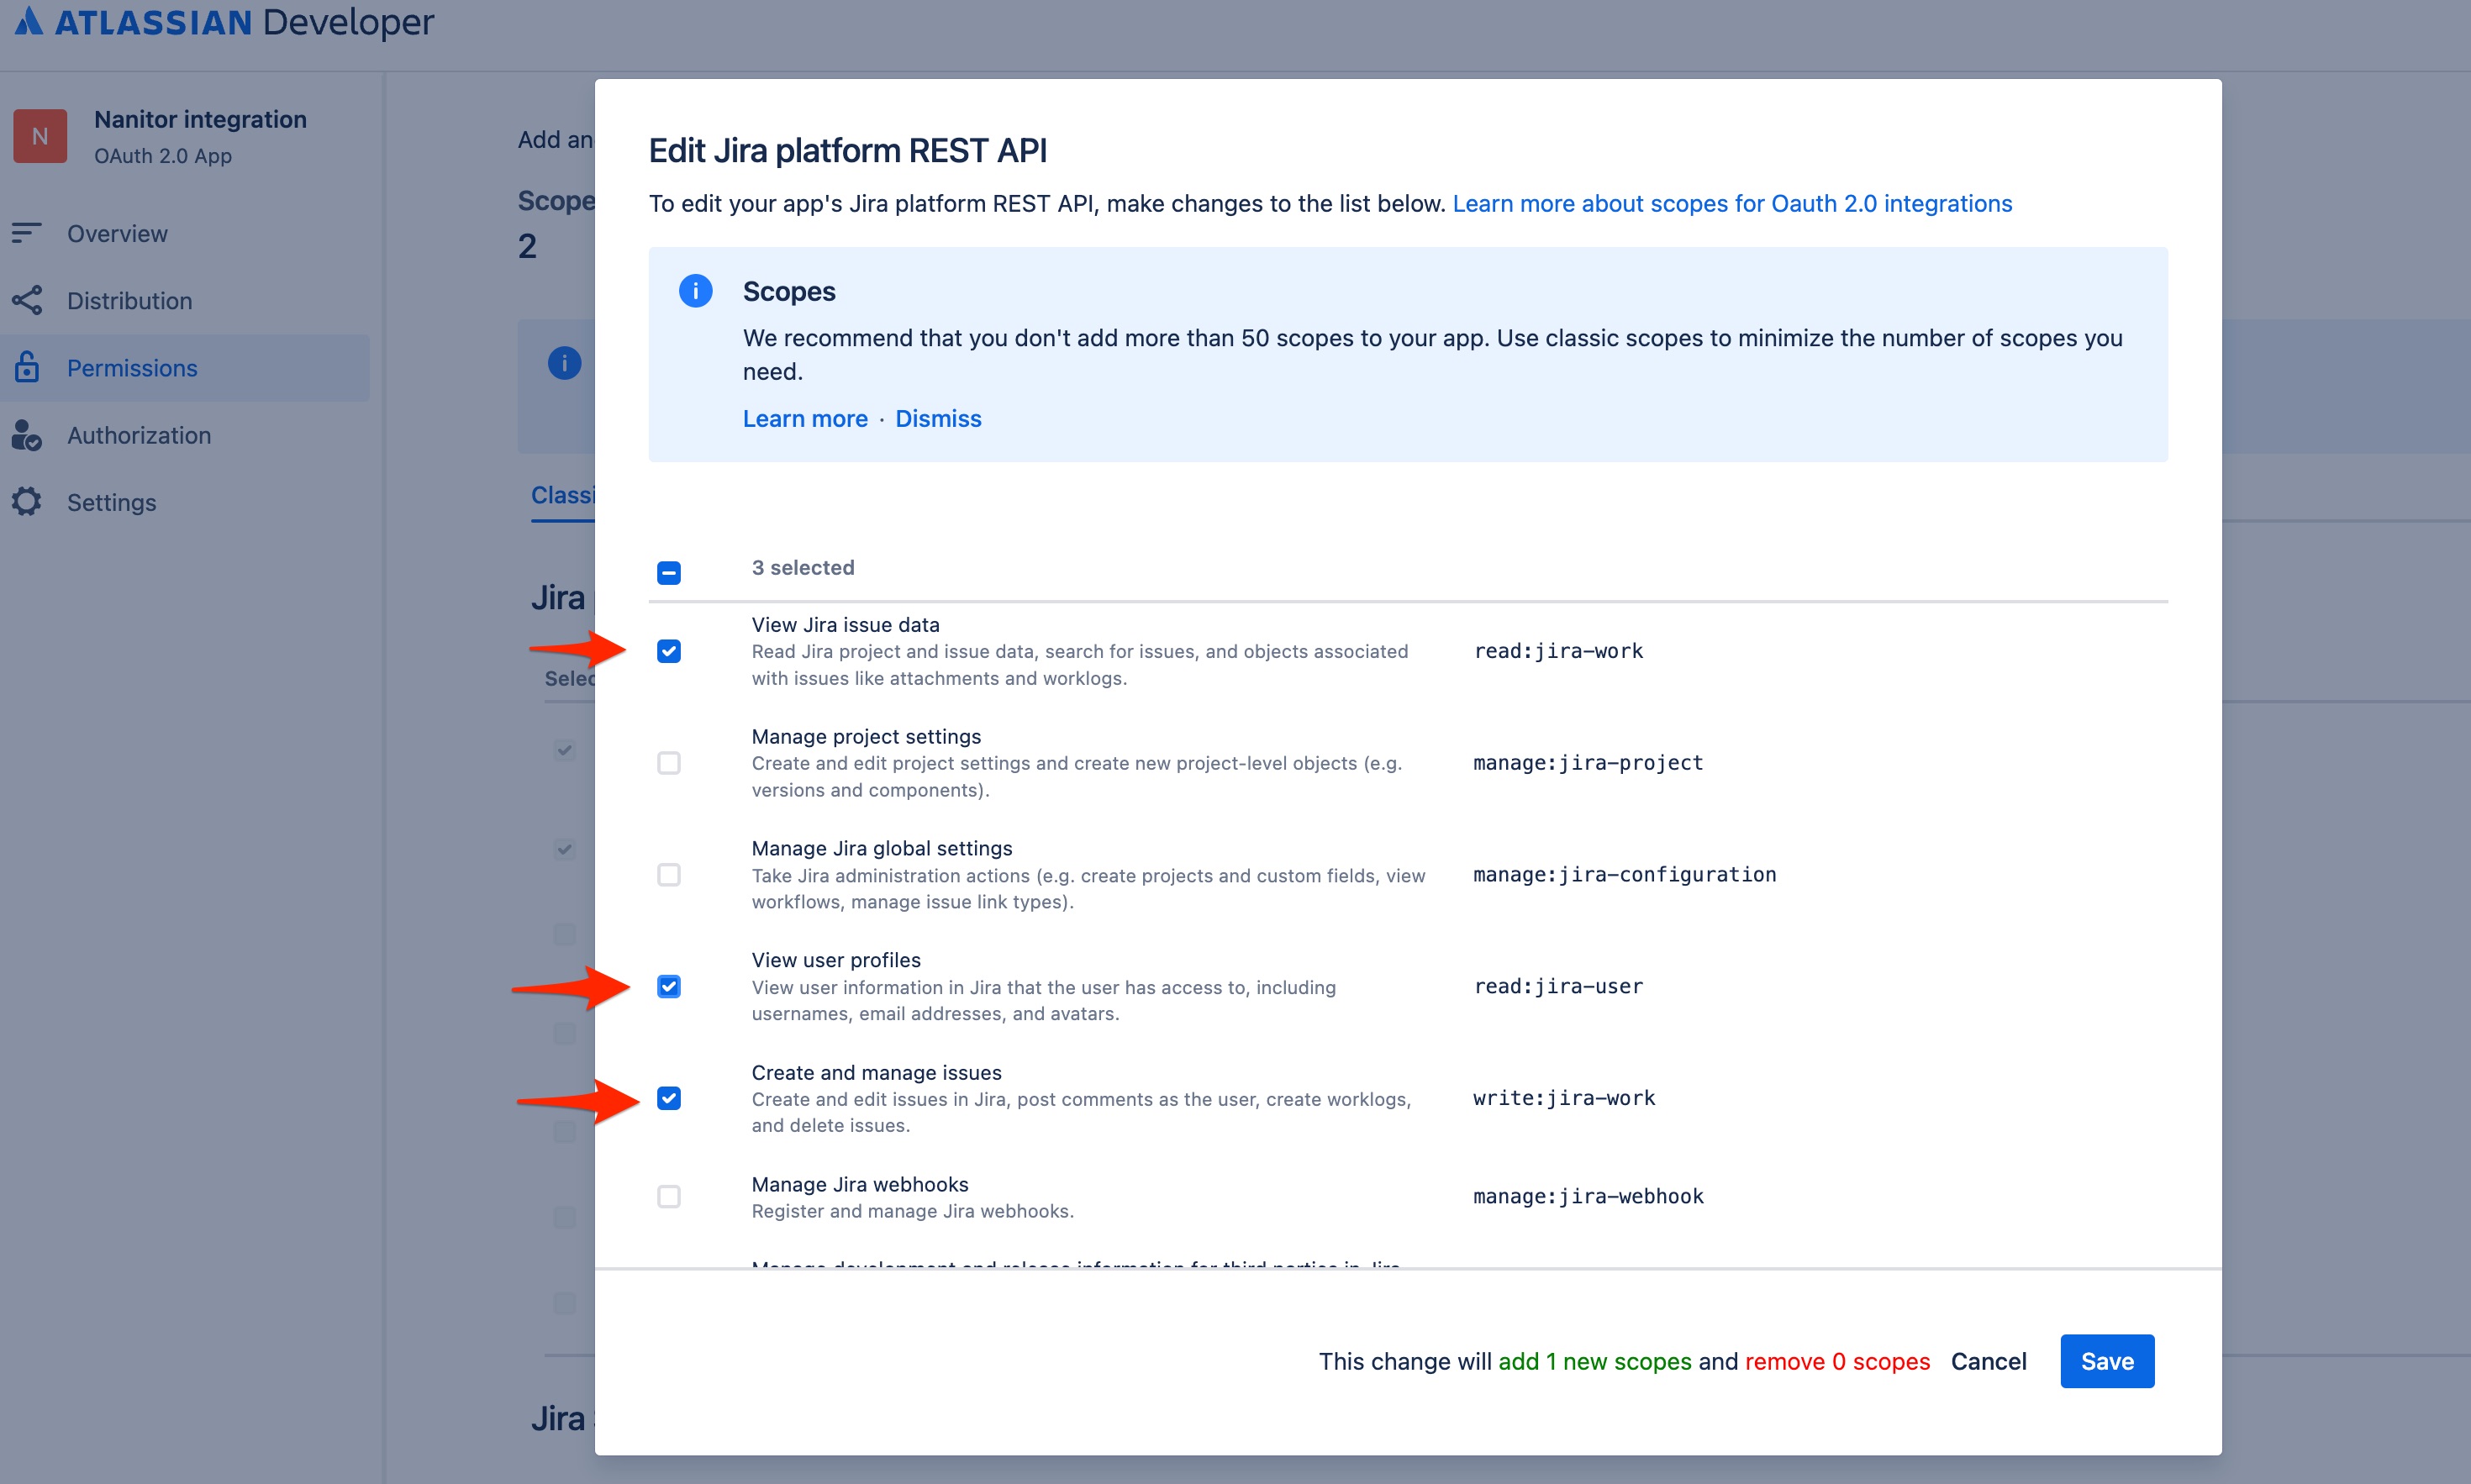
Then configure the scopes of the application to allow Nanitor to View issue data (read:jira-work, View user profiles (read:jira-user) and Create and manage issues (write:jira-work).
In the Authorization tab click the Add button to create the OAuth authentication method.
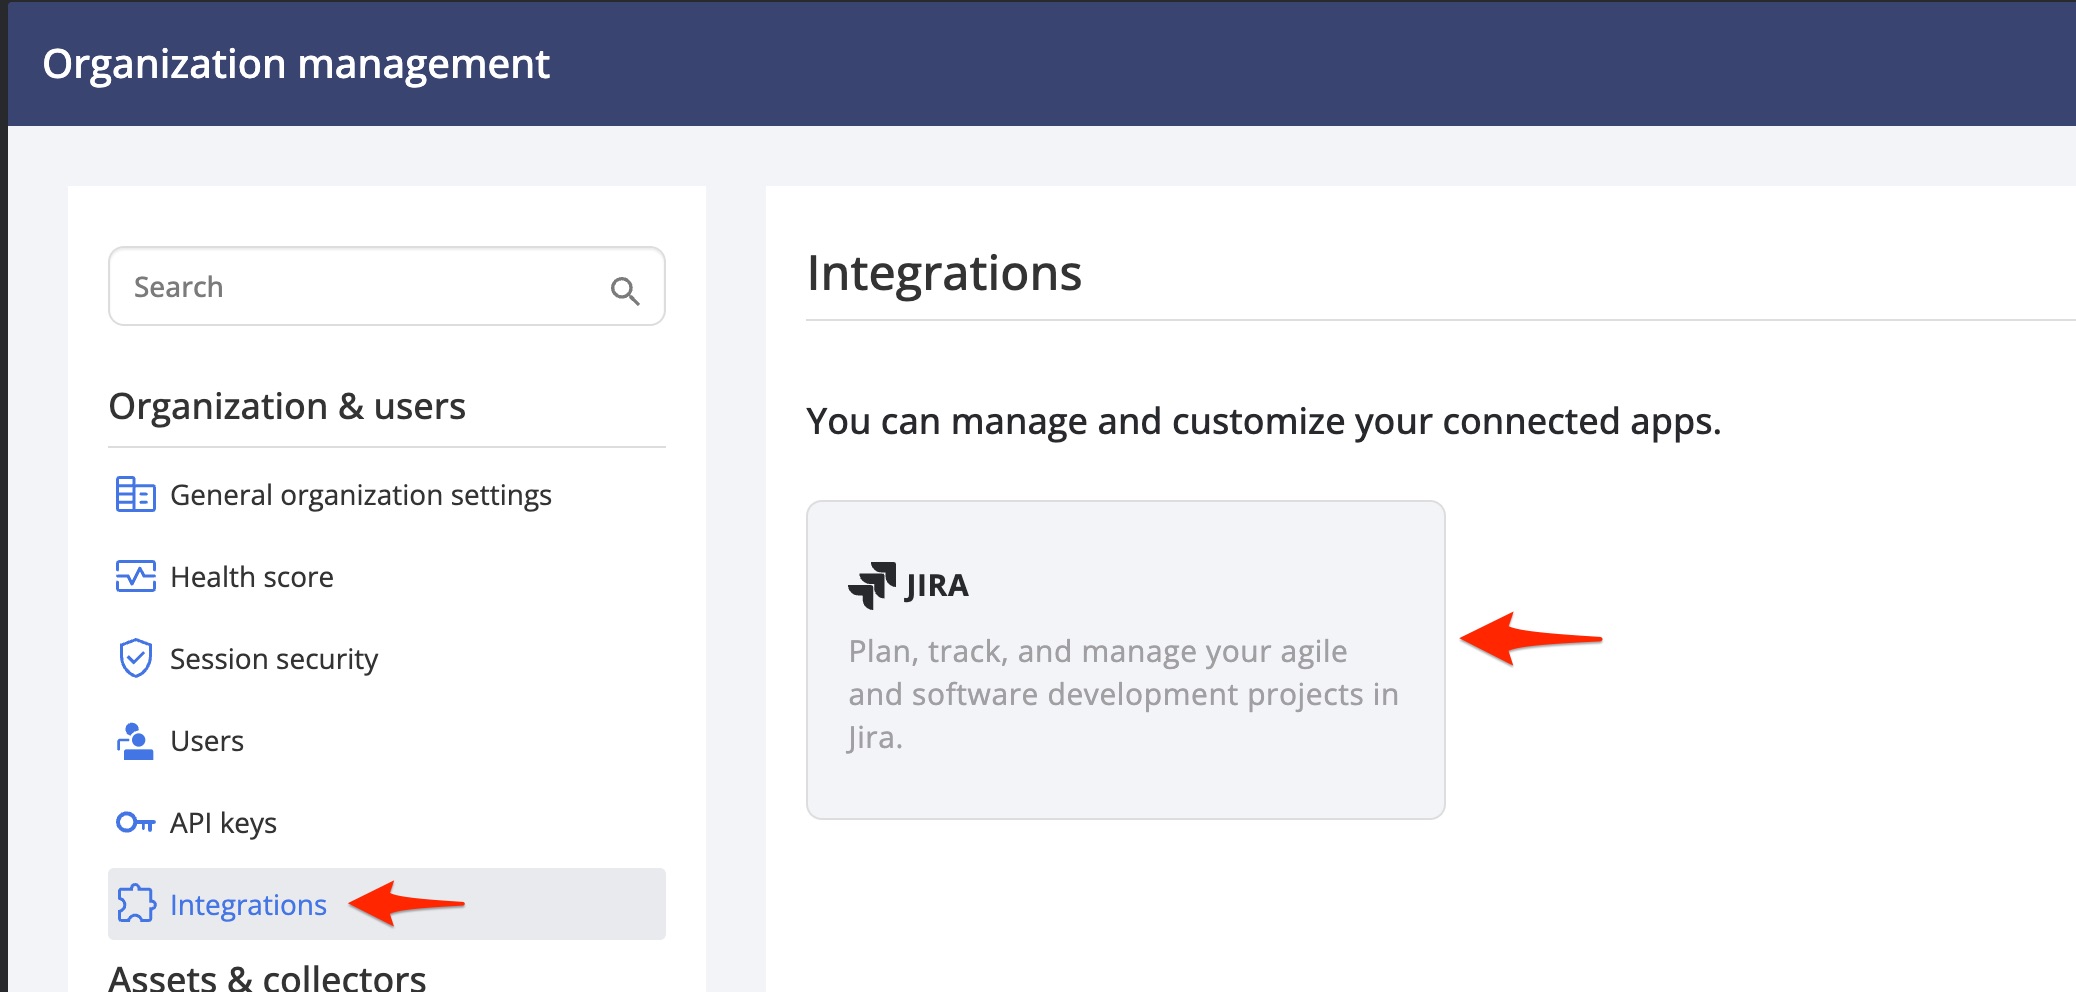
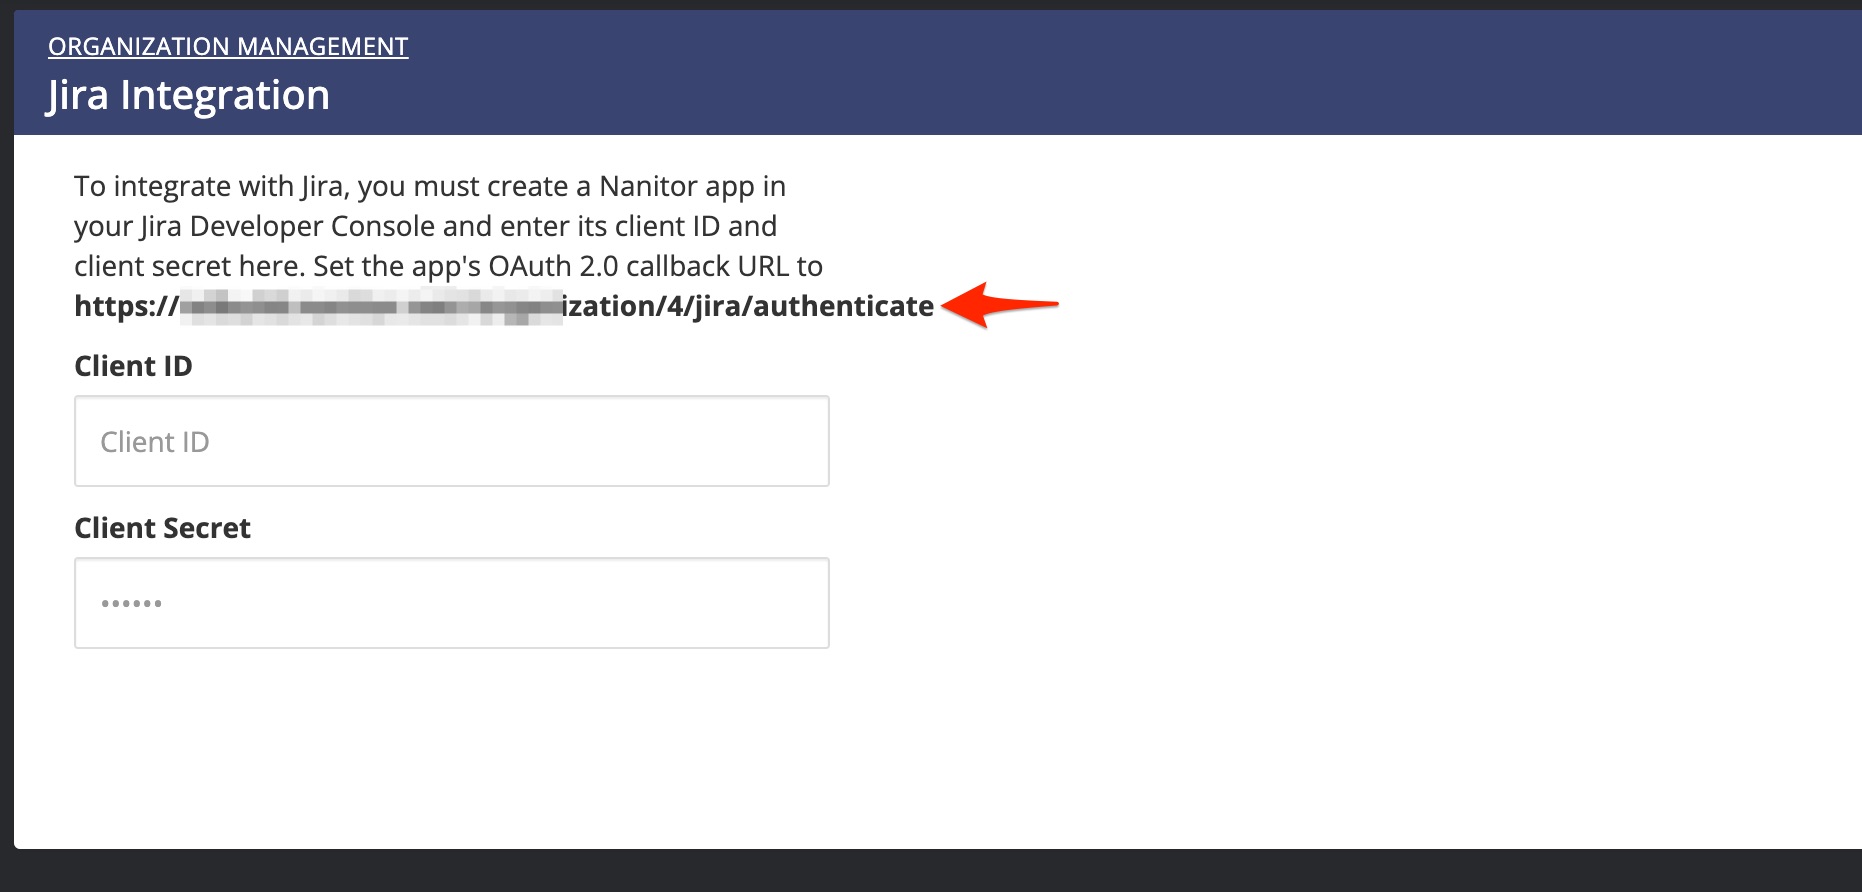
Jira will ask you for a callback url. You find this URL in Nanitor when you navigate to Organization management → Integrations
From here click on the Jira image which will reveal the callback URL to use for your Jira application
Enter the value in the Jira developer console accordingly.
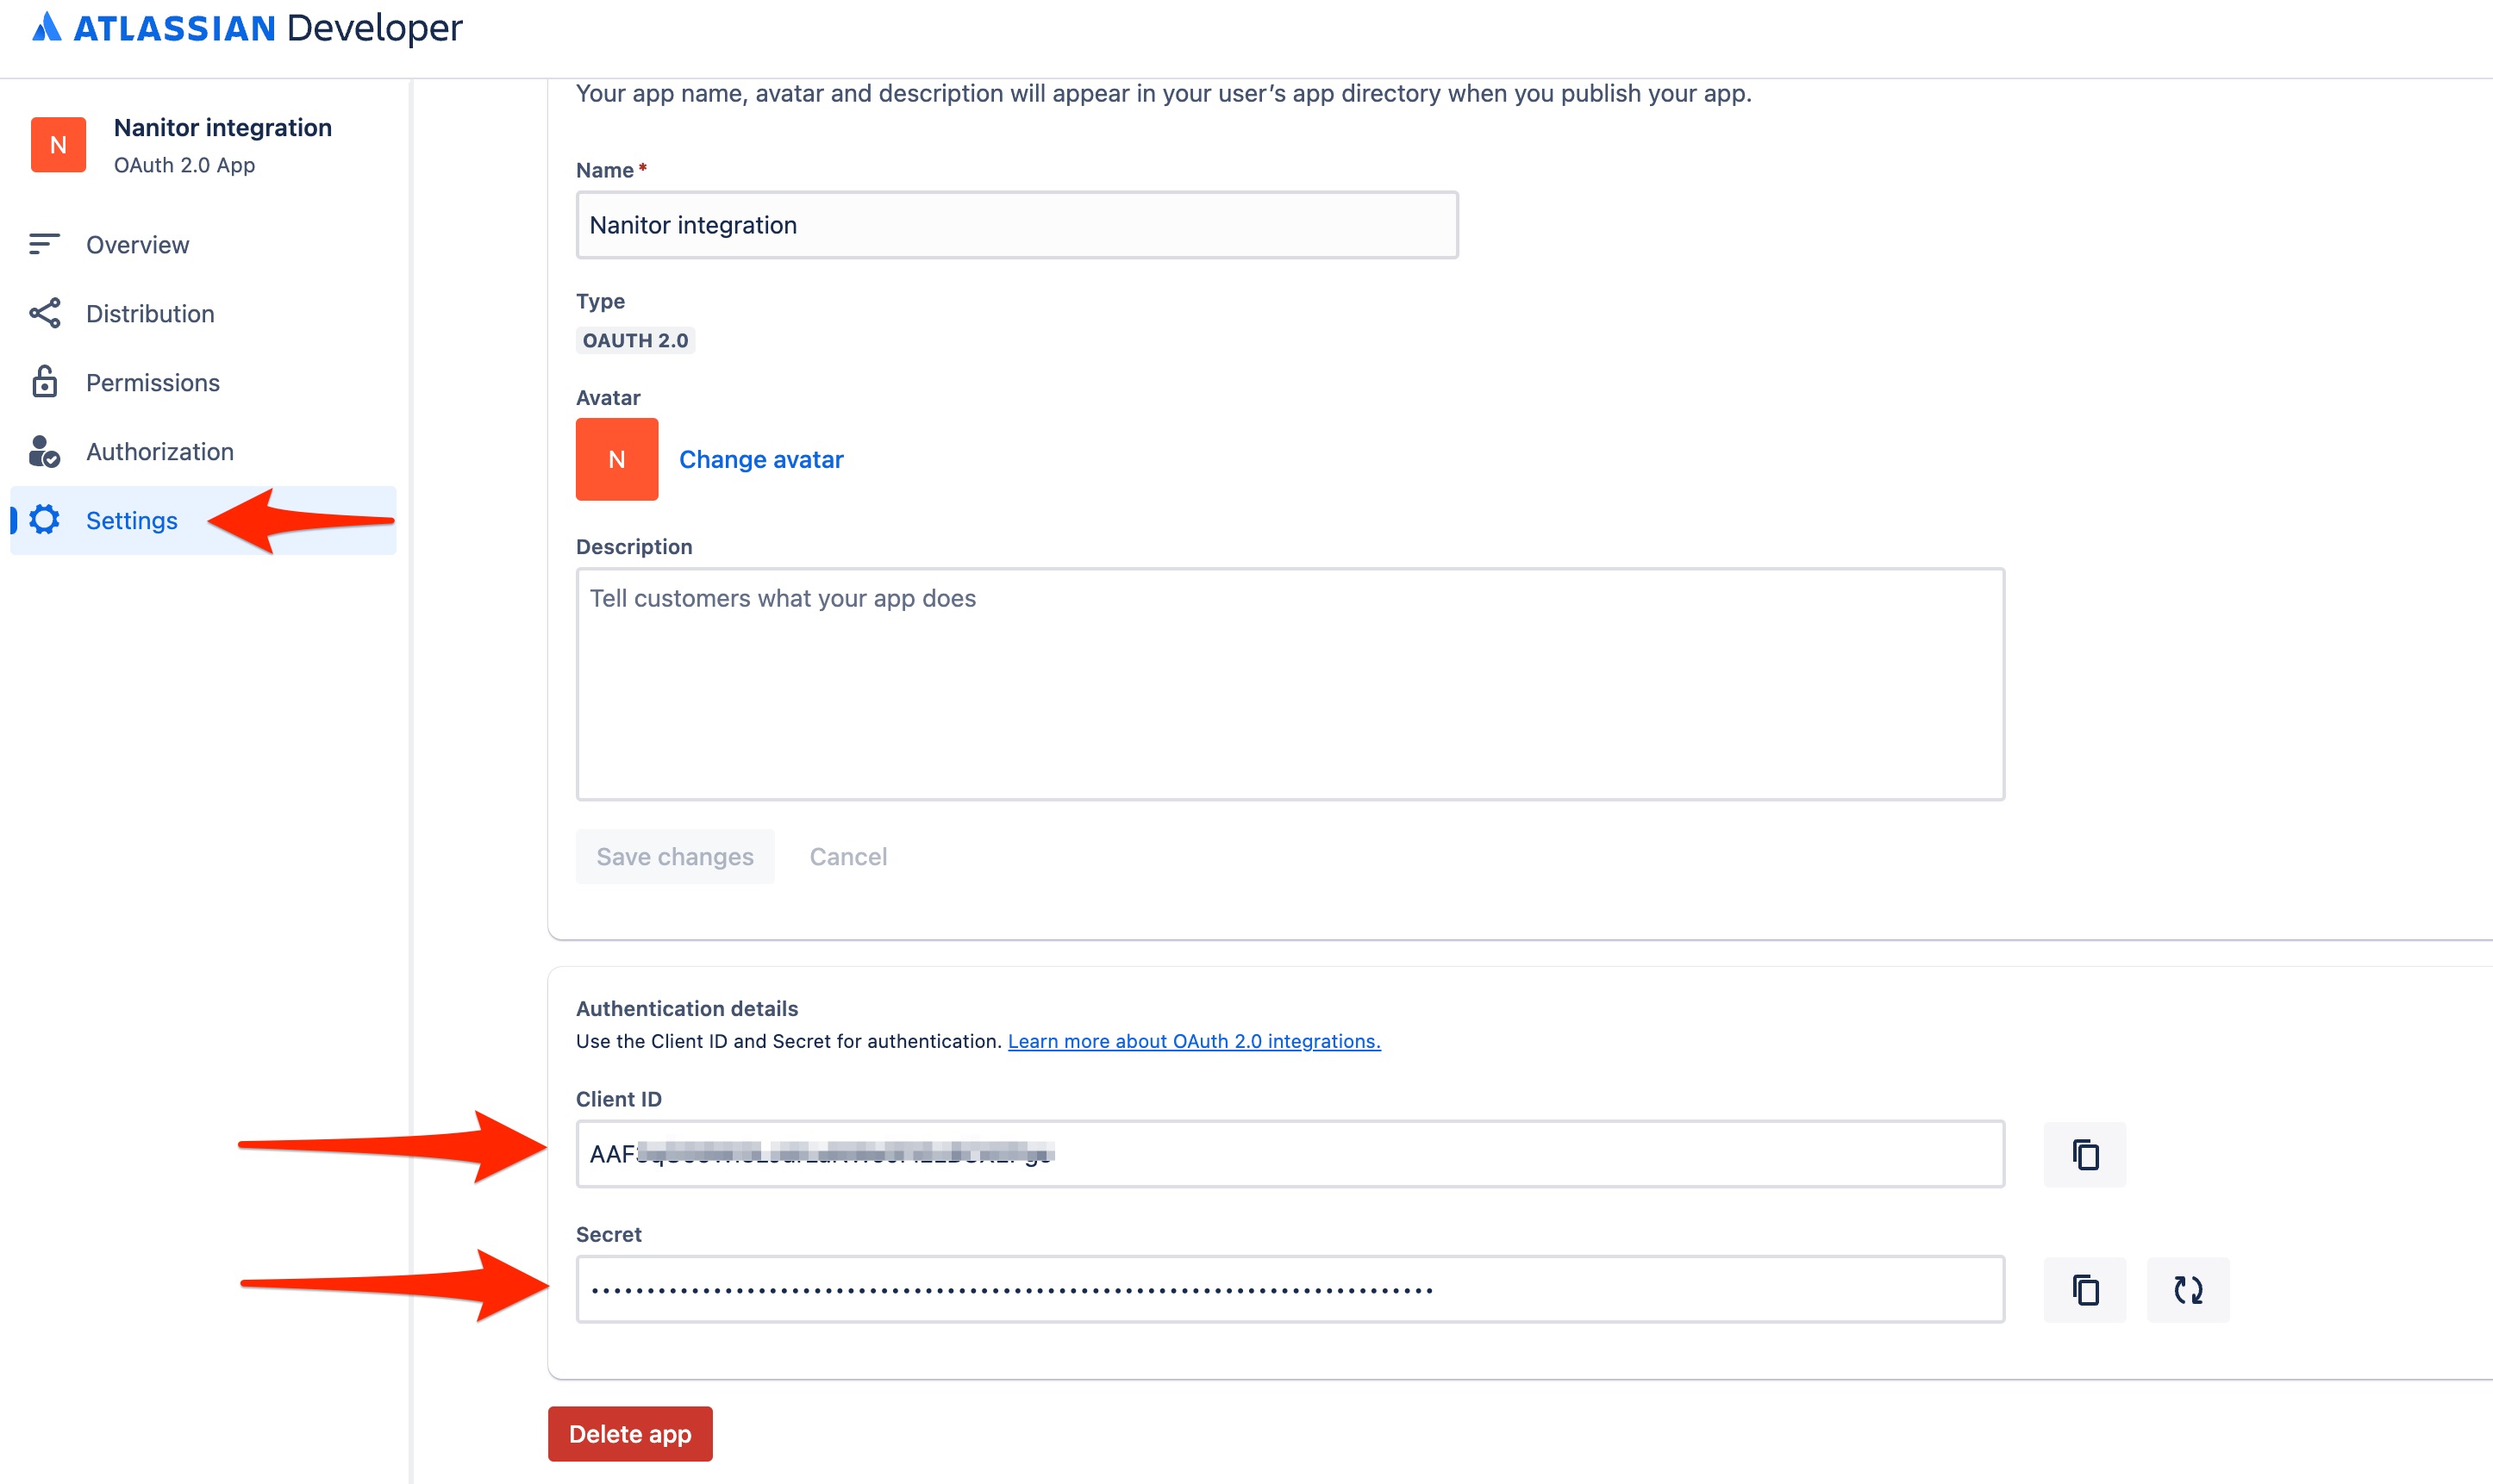
Then head to the Settings tab and get your client_id and secret
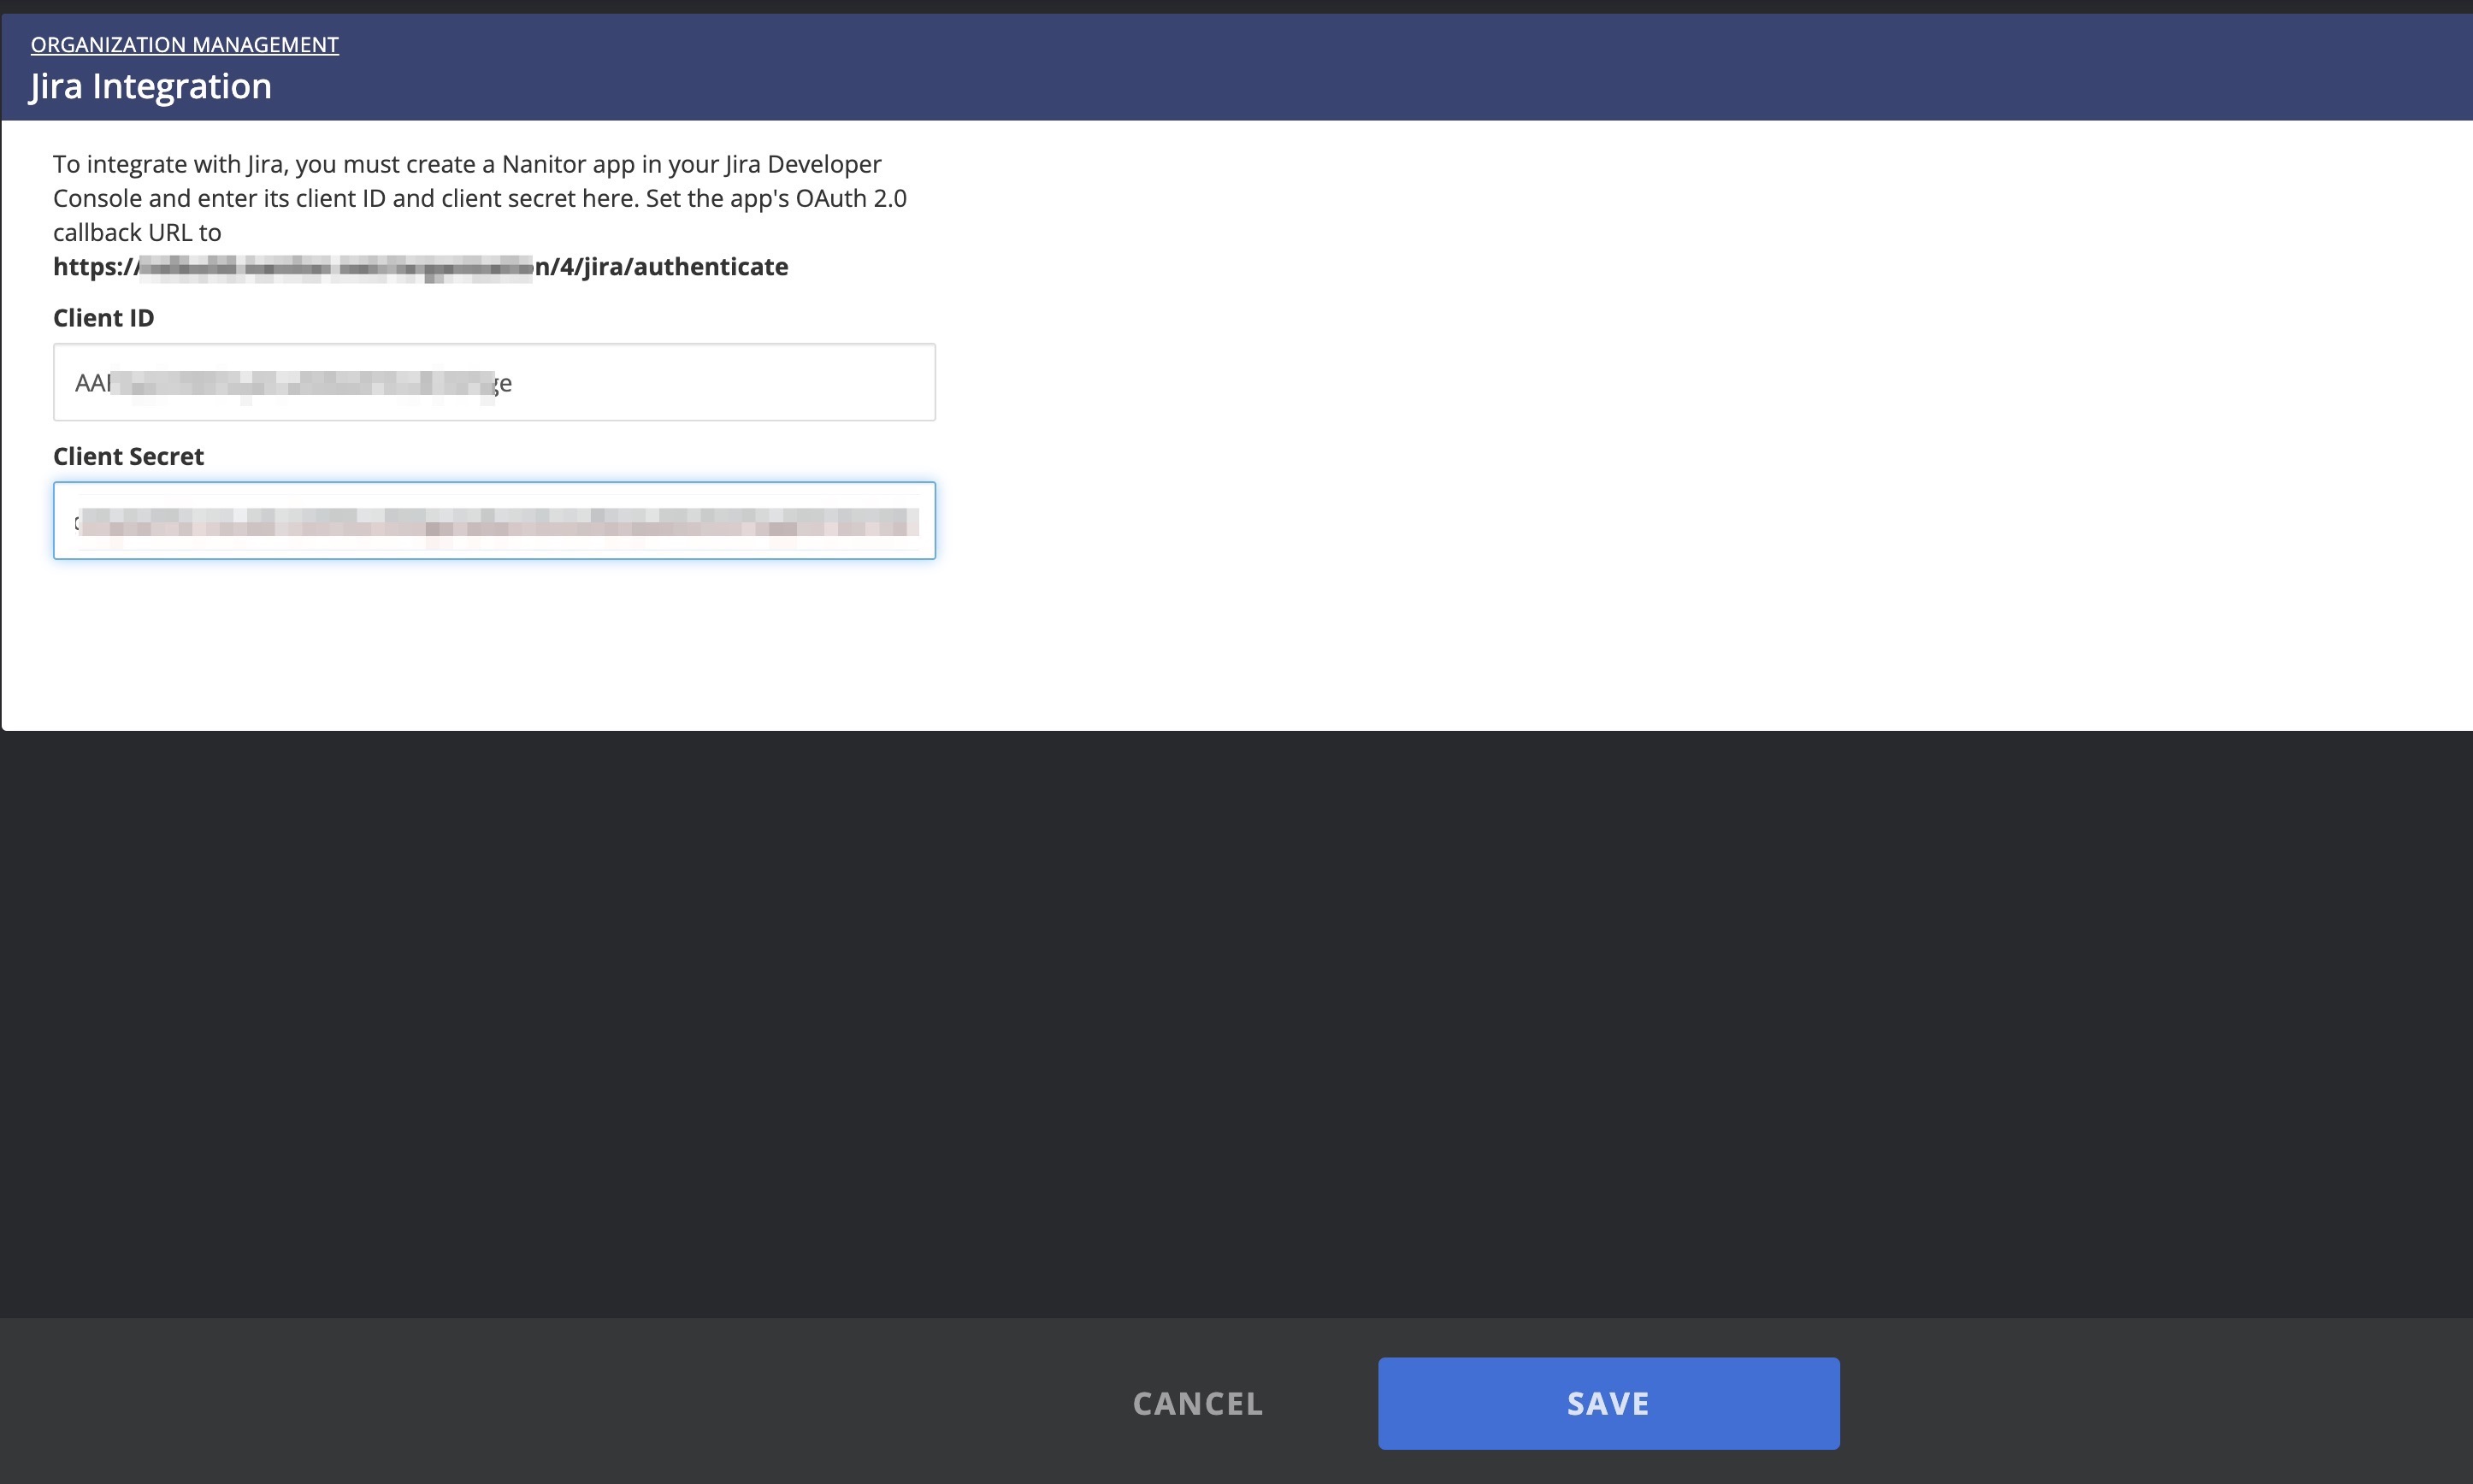
Head back to Nanitor and enter the client_id and secret
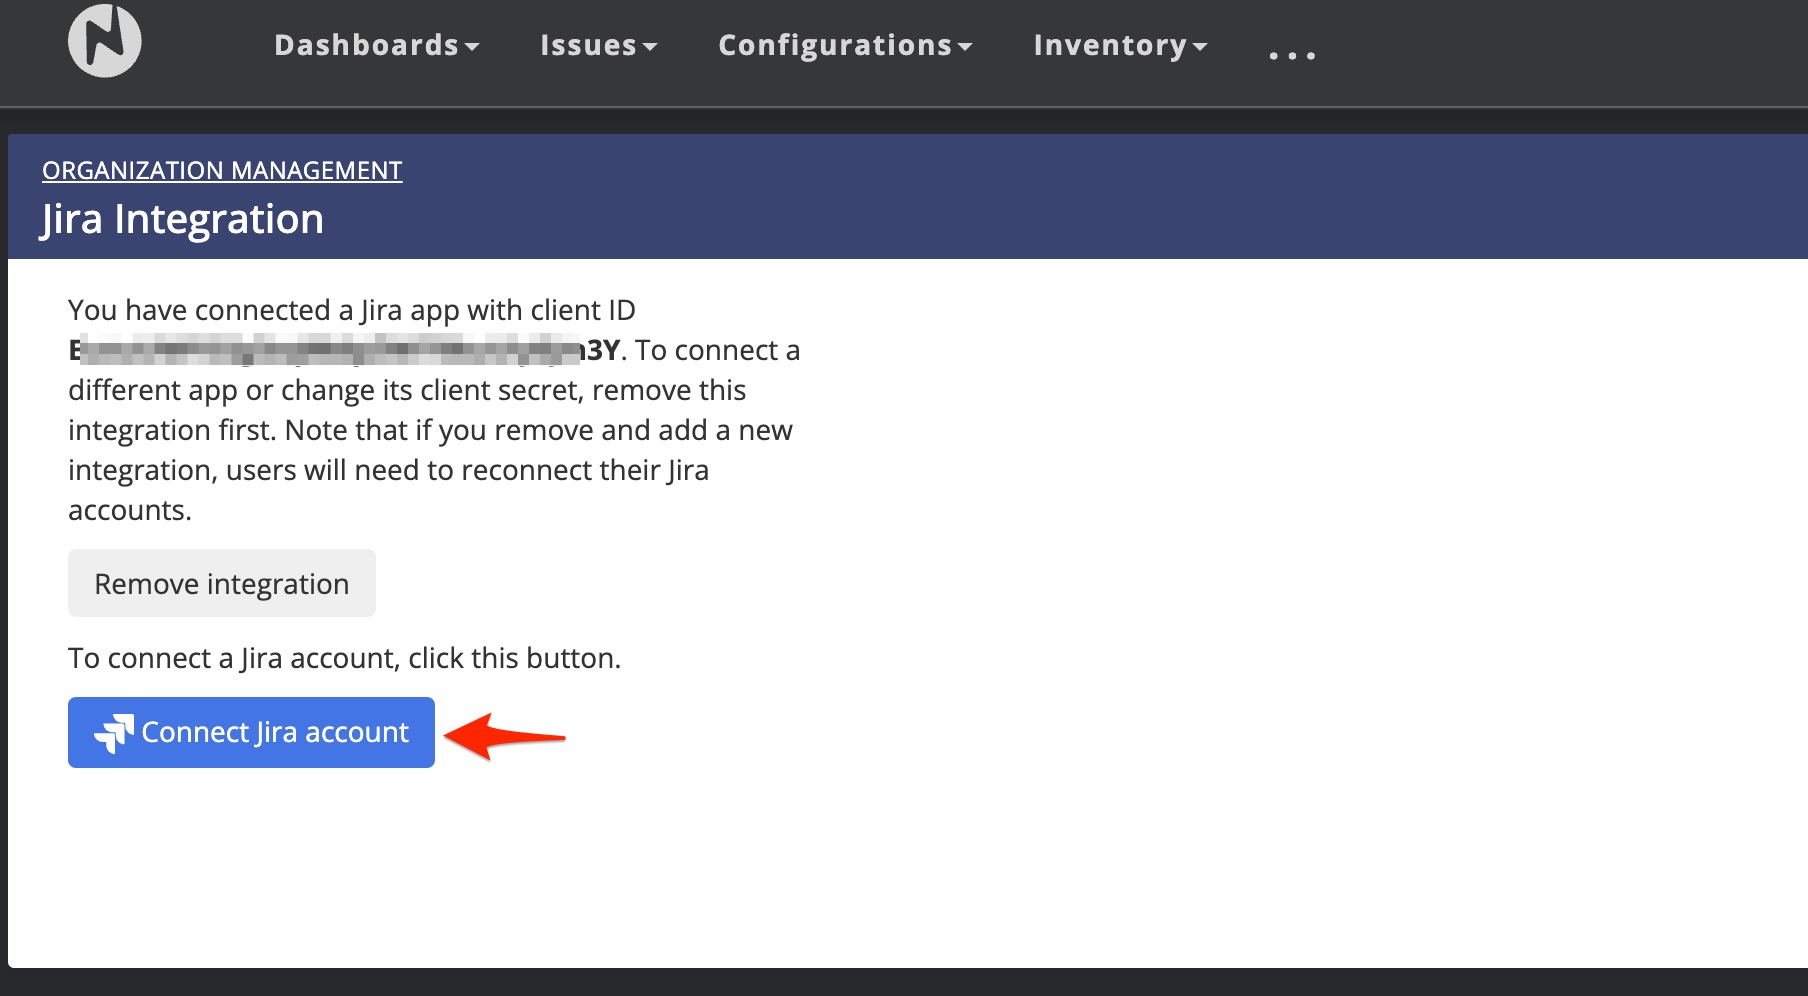
When you enter your credentials successfully you will get a confirmation that the app is connected. Next, you need to connect the Jira application with your Jira account.
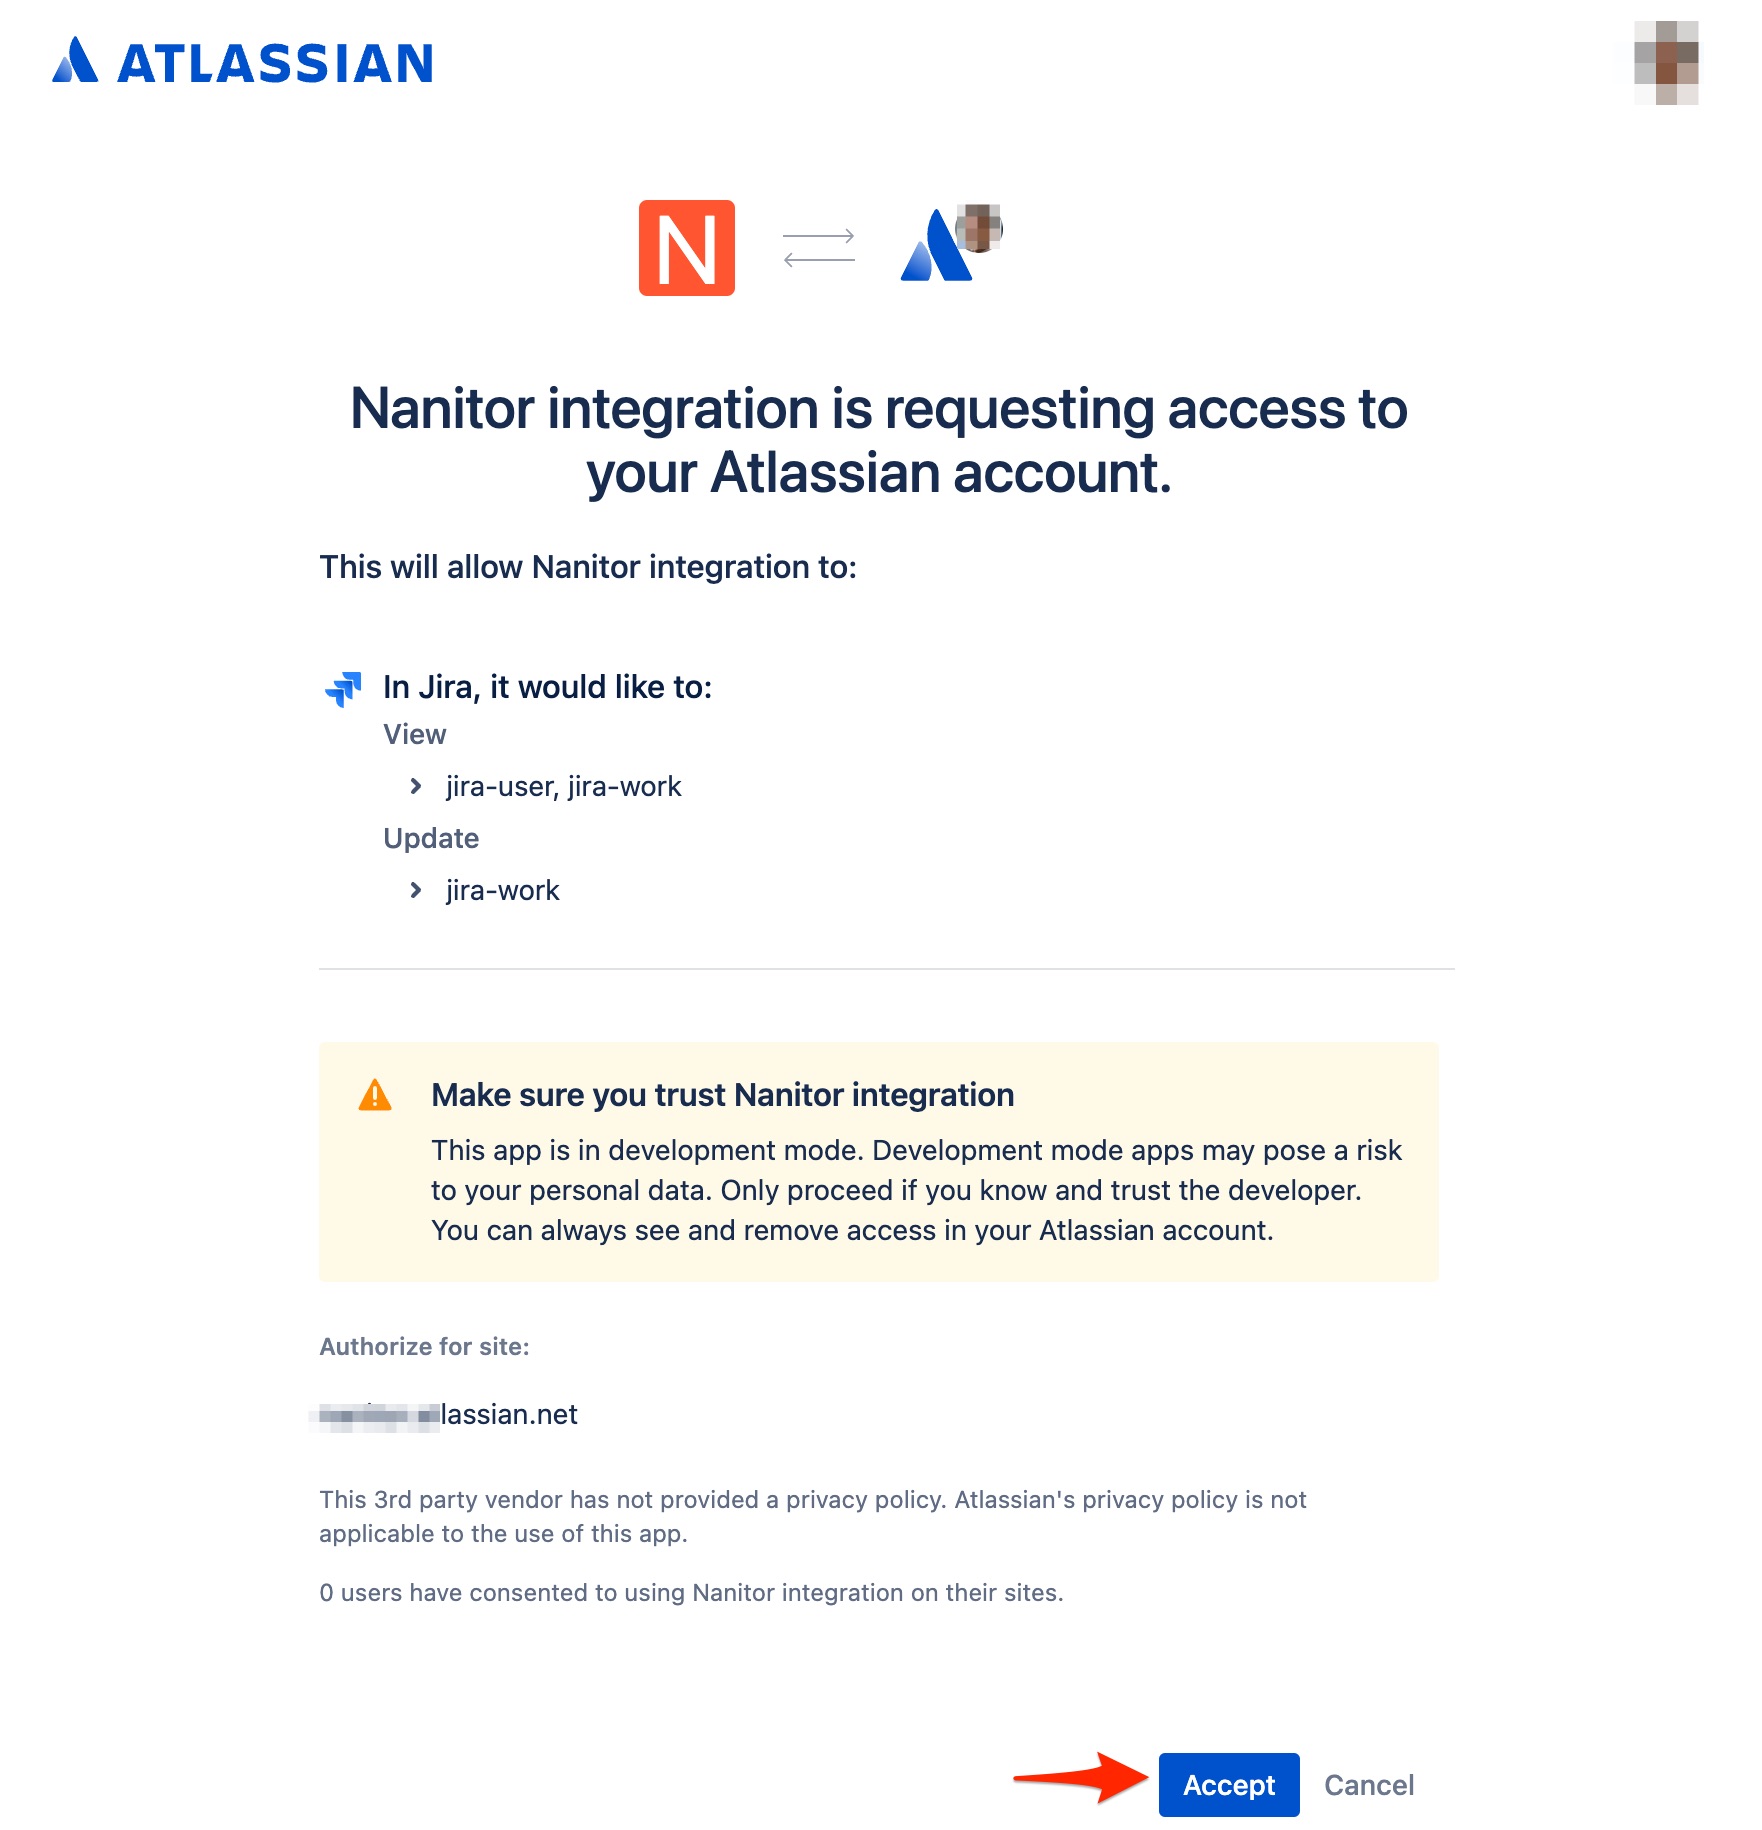
In the upcoming screen, you need to confirm the access you will grant to the Jira application by clicking Accept.
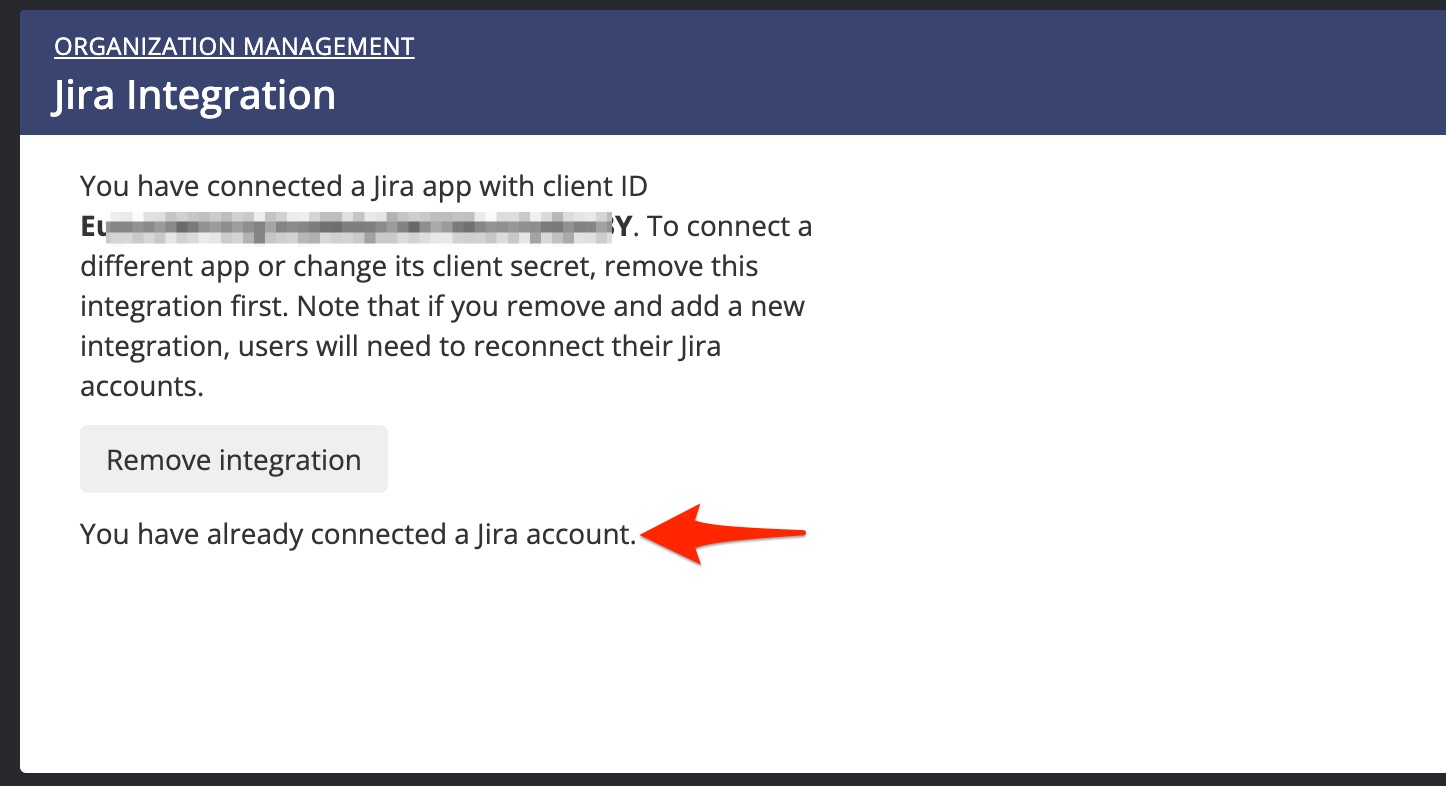
After confirmation, your Jira integration page should state the confirmation of a successful integration.
Create a Jira issue from Nanitor
Once the connection between Nanitor and Jira has been established you can create seamlessly Jira issues from issues or projects in Nanitor. You can only create a Jira issue from a single Nanitor issue. A creation for multiple Nanitor issues can be achieved by creating a Nanitor project first.
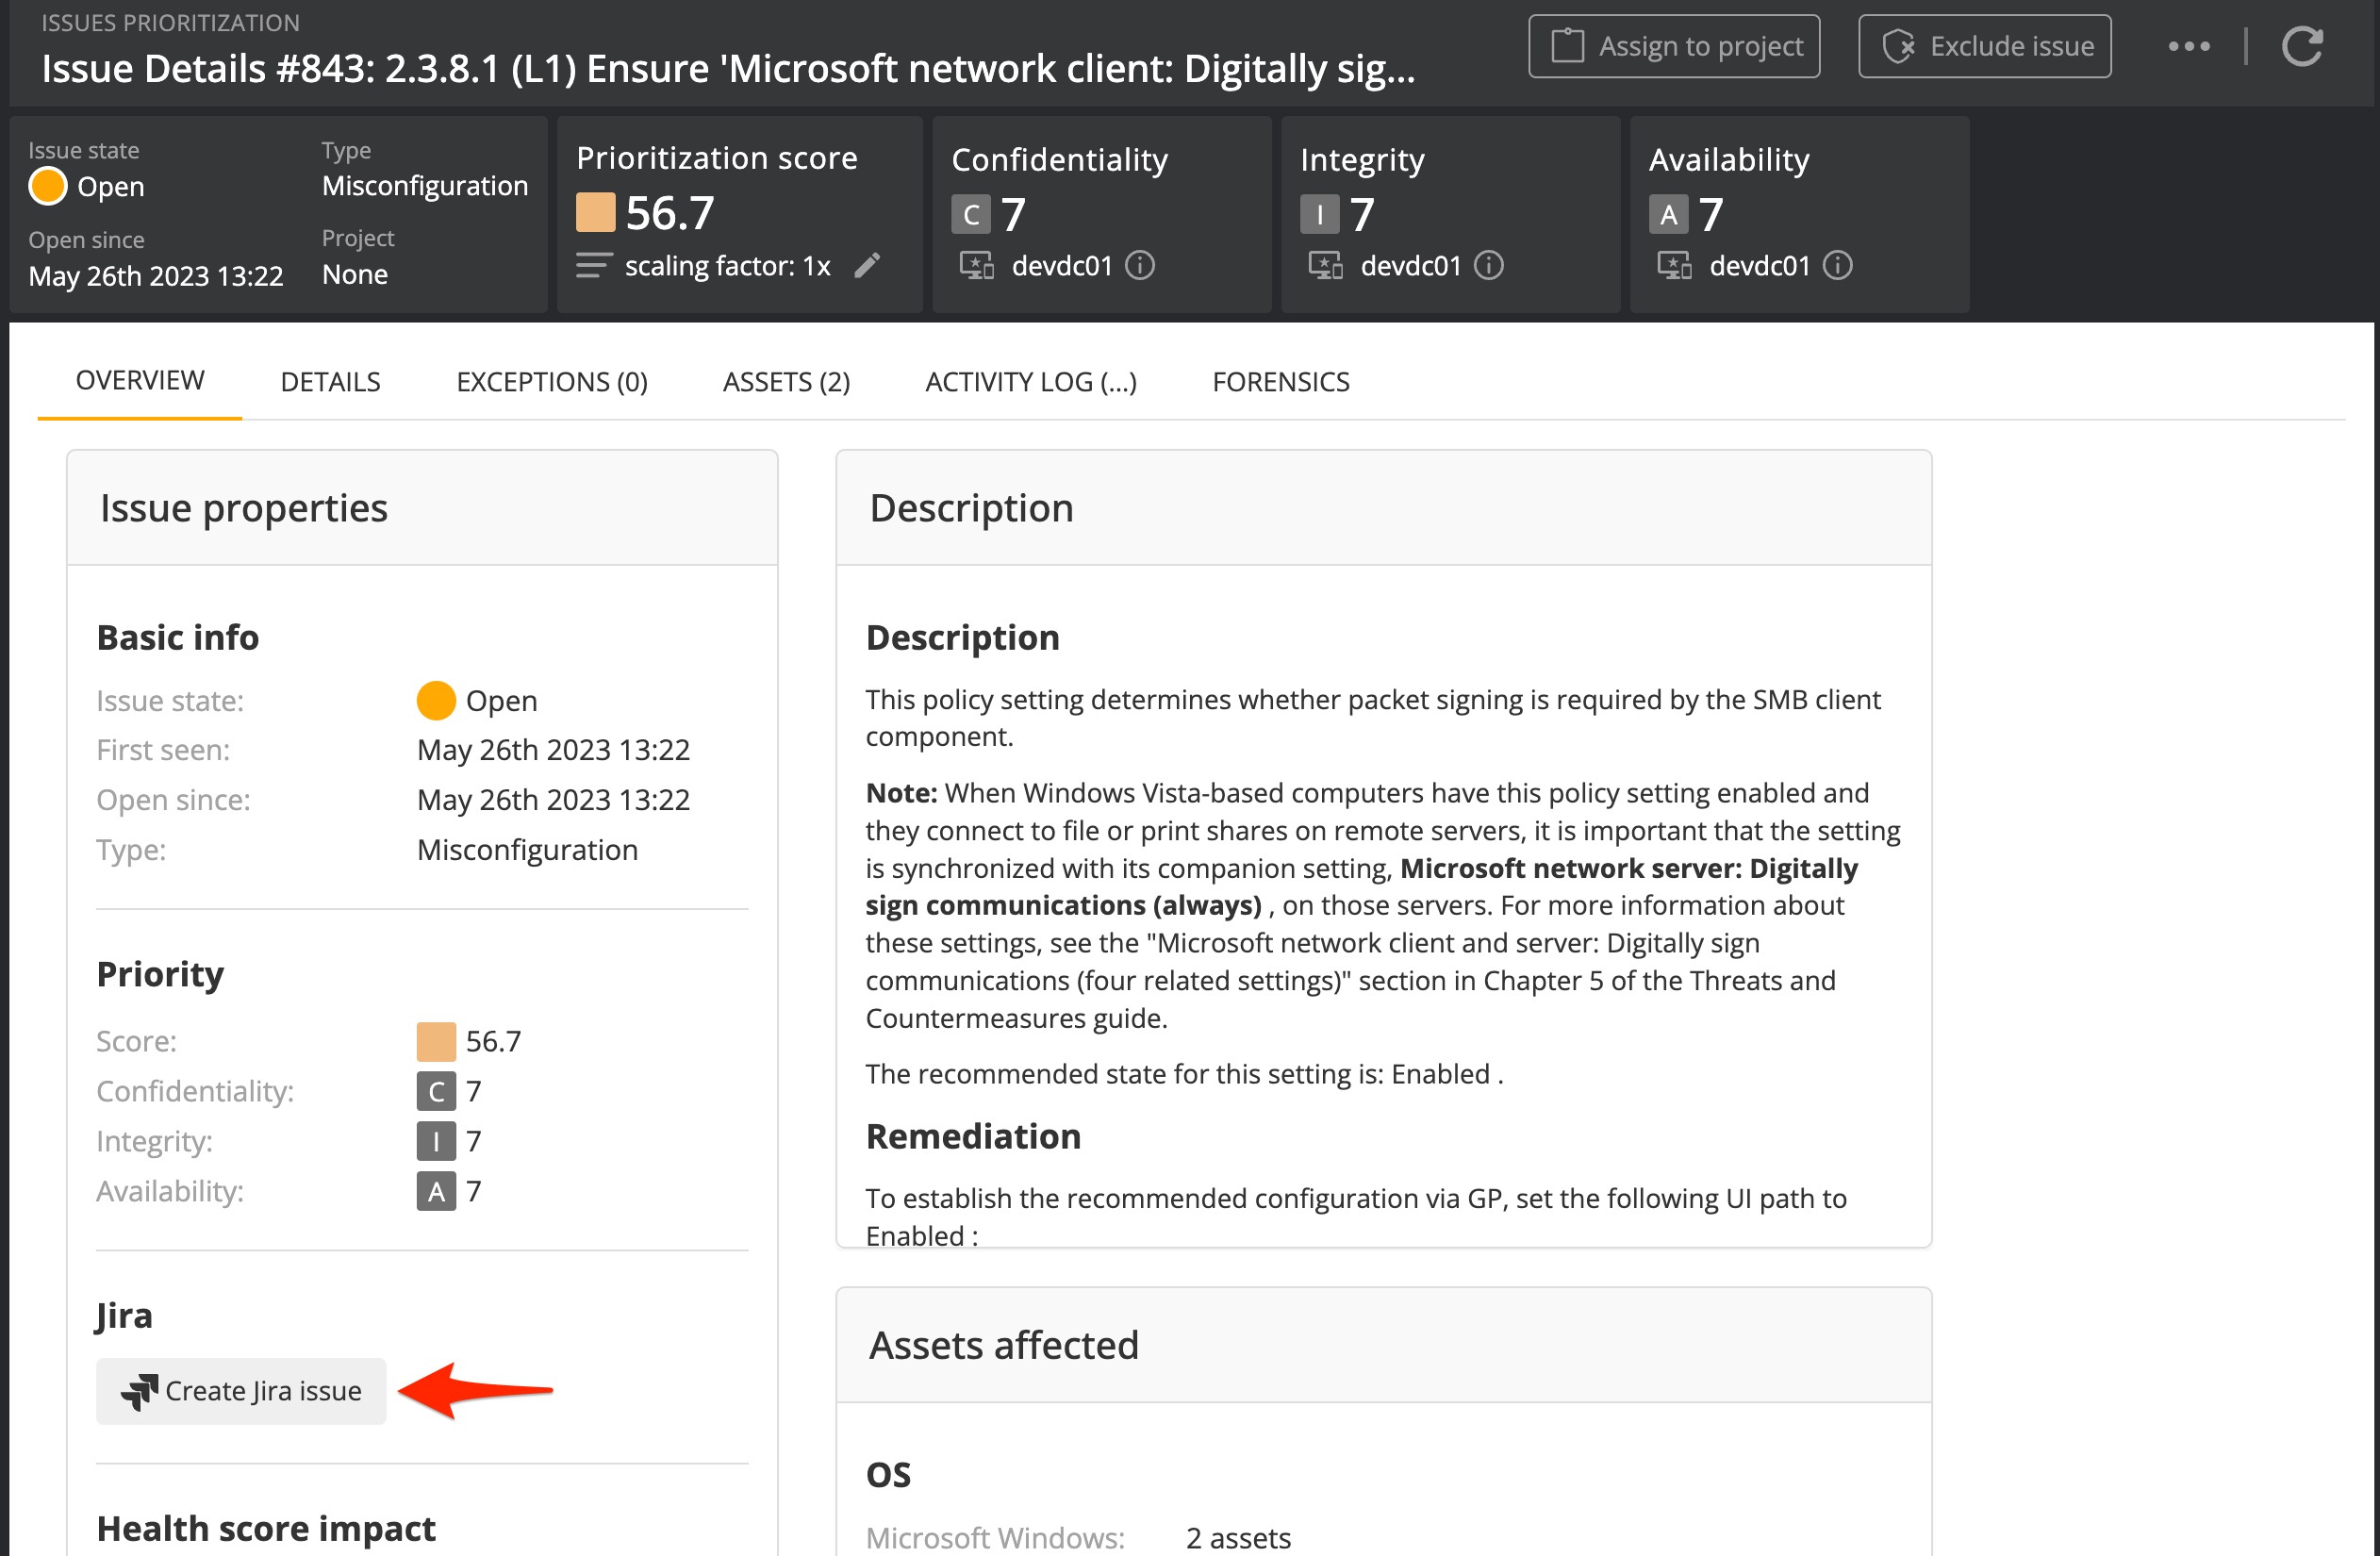
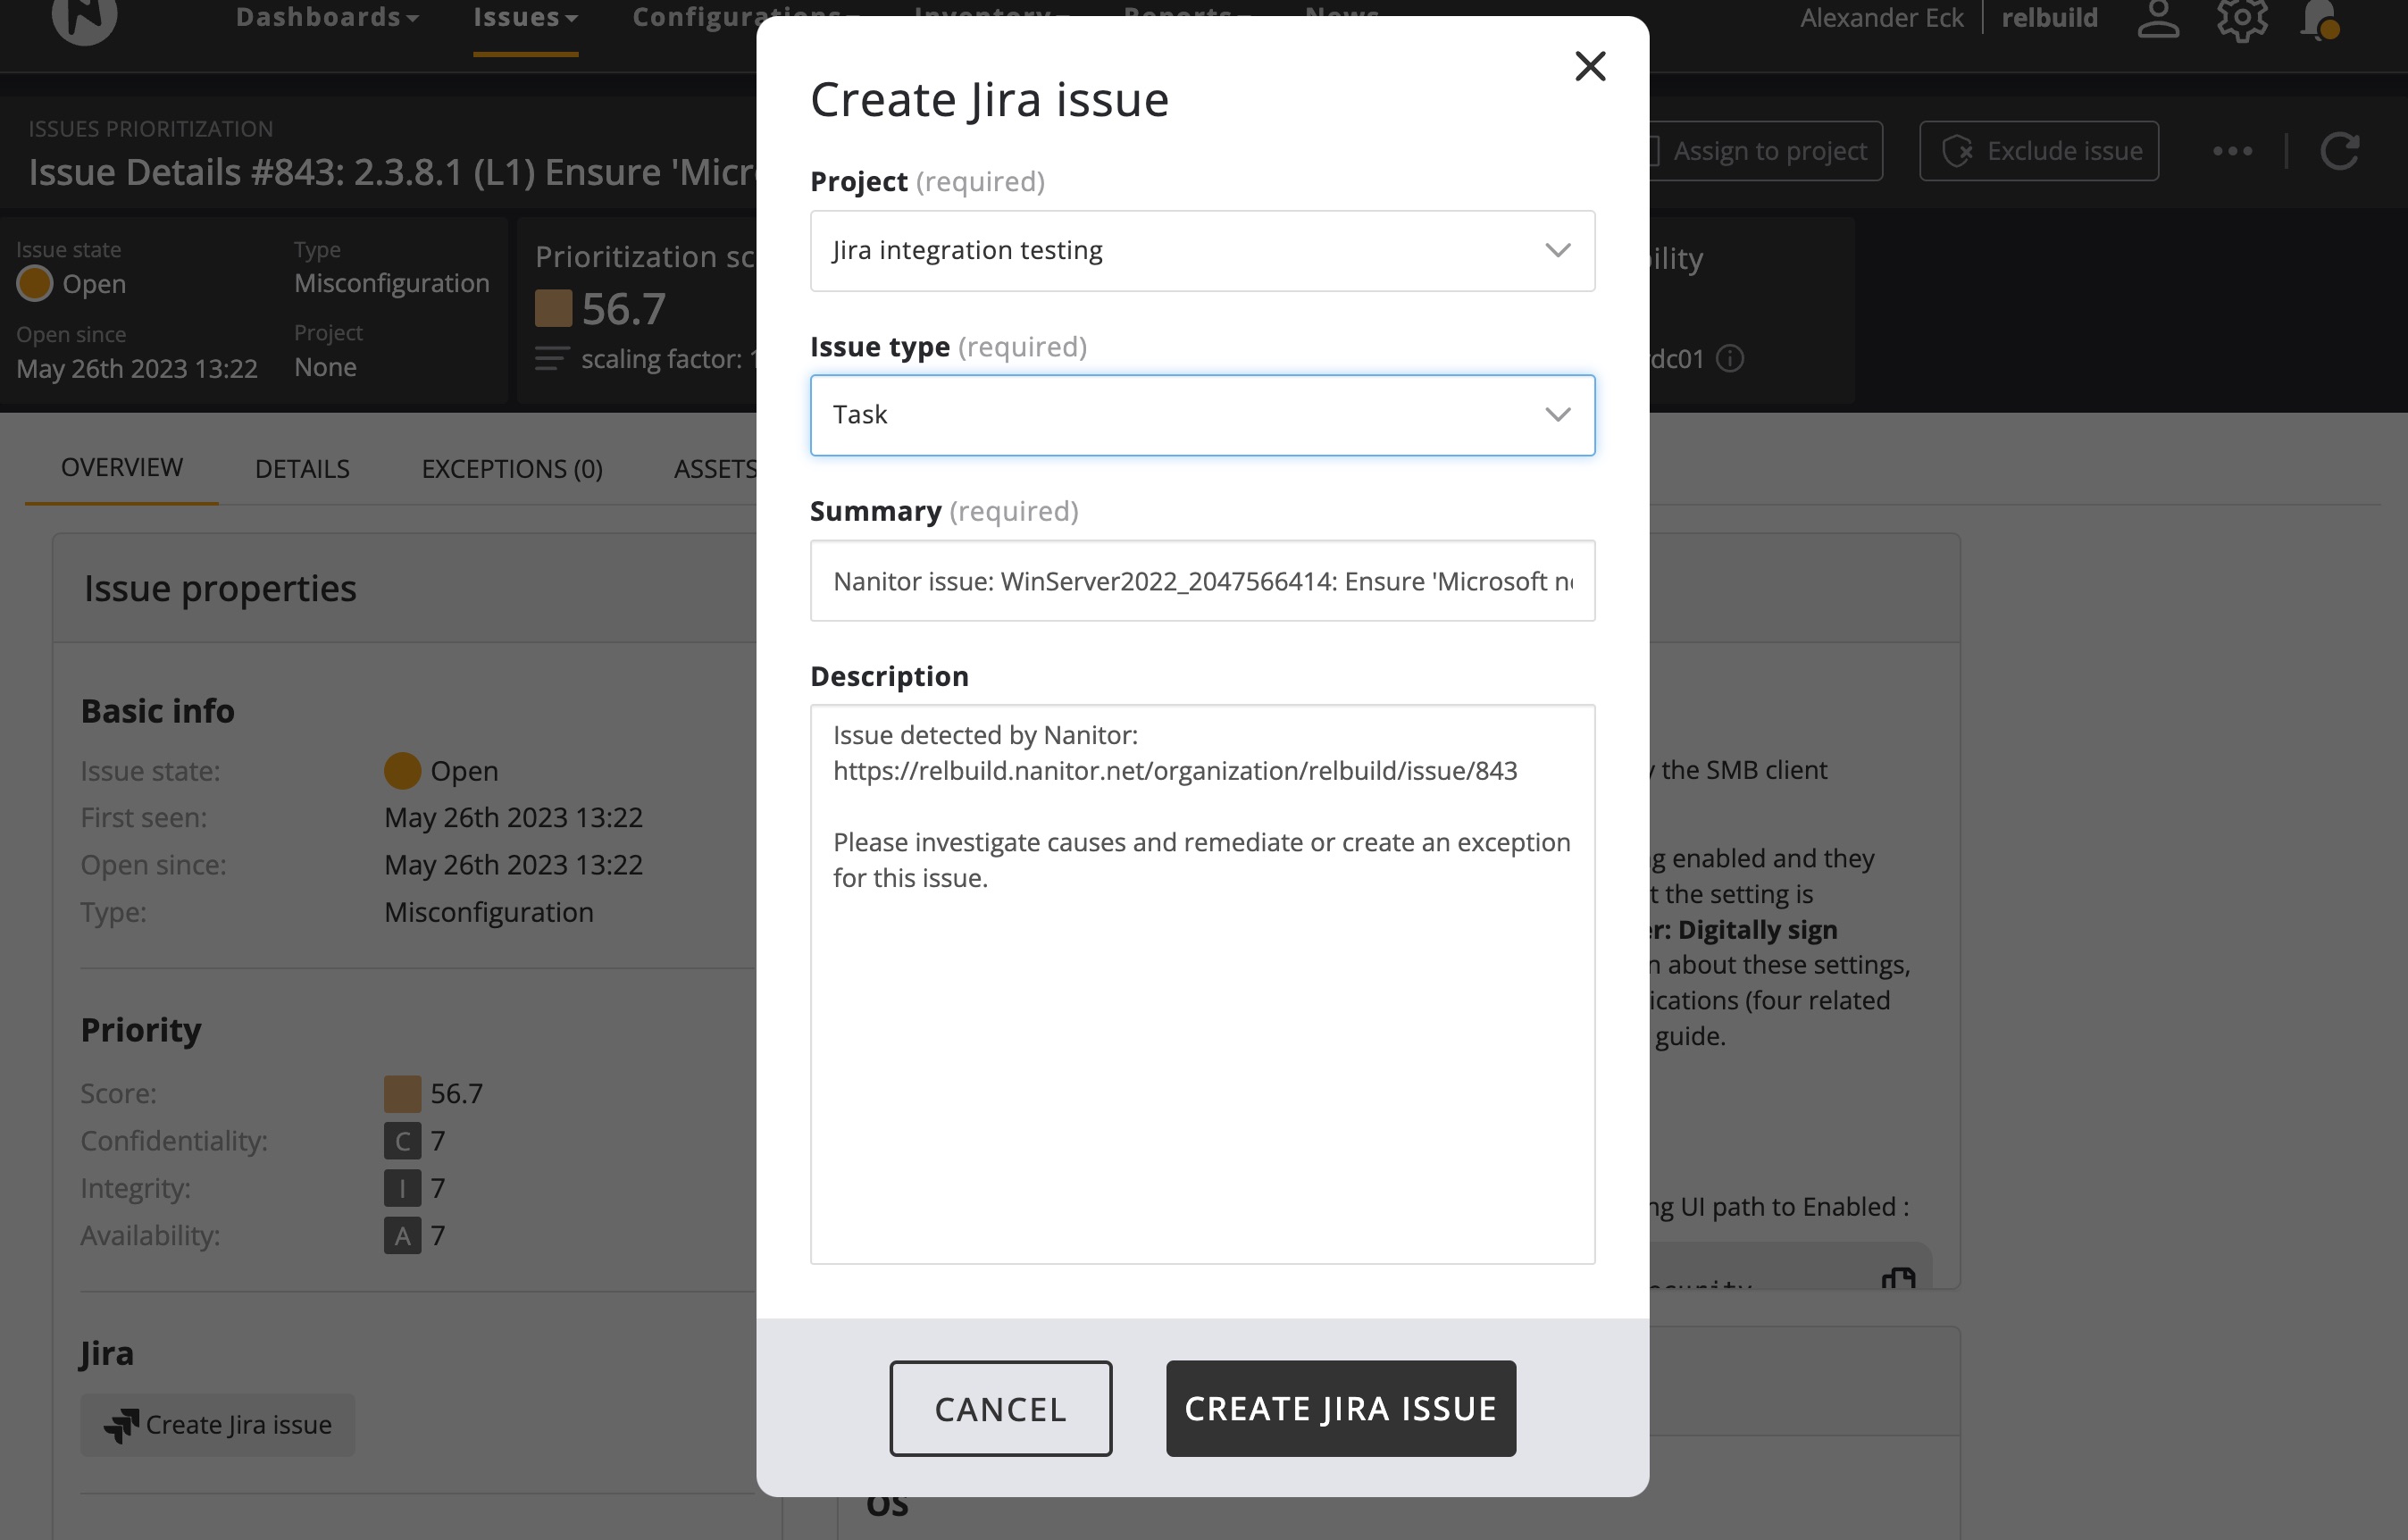
Open any issue in Nanitor. Watch out for the Jira section on the issue overview tab.
Click on the Create Jira issue button. This will bring up a dialog where you need to select the Jira project where you want to create the issue and the Issue type. The Summary and the Description will be prepopulated, but can easily be modified to match your needs. Click Create to create the ticket in Jira.
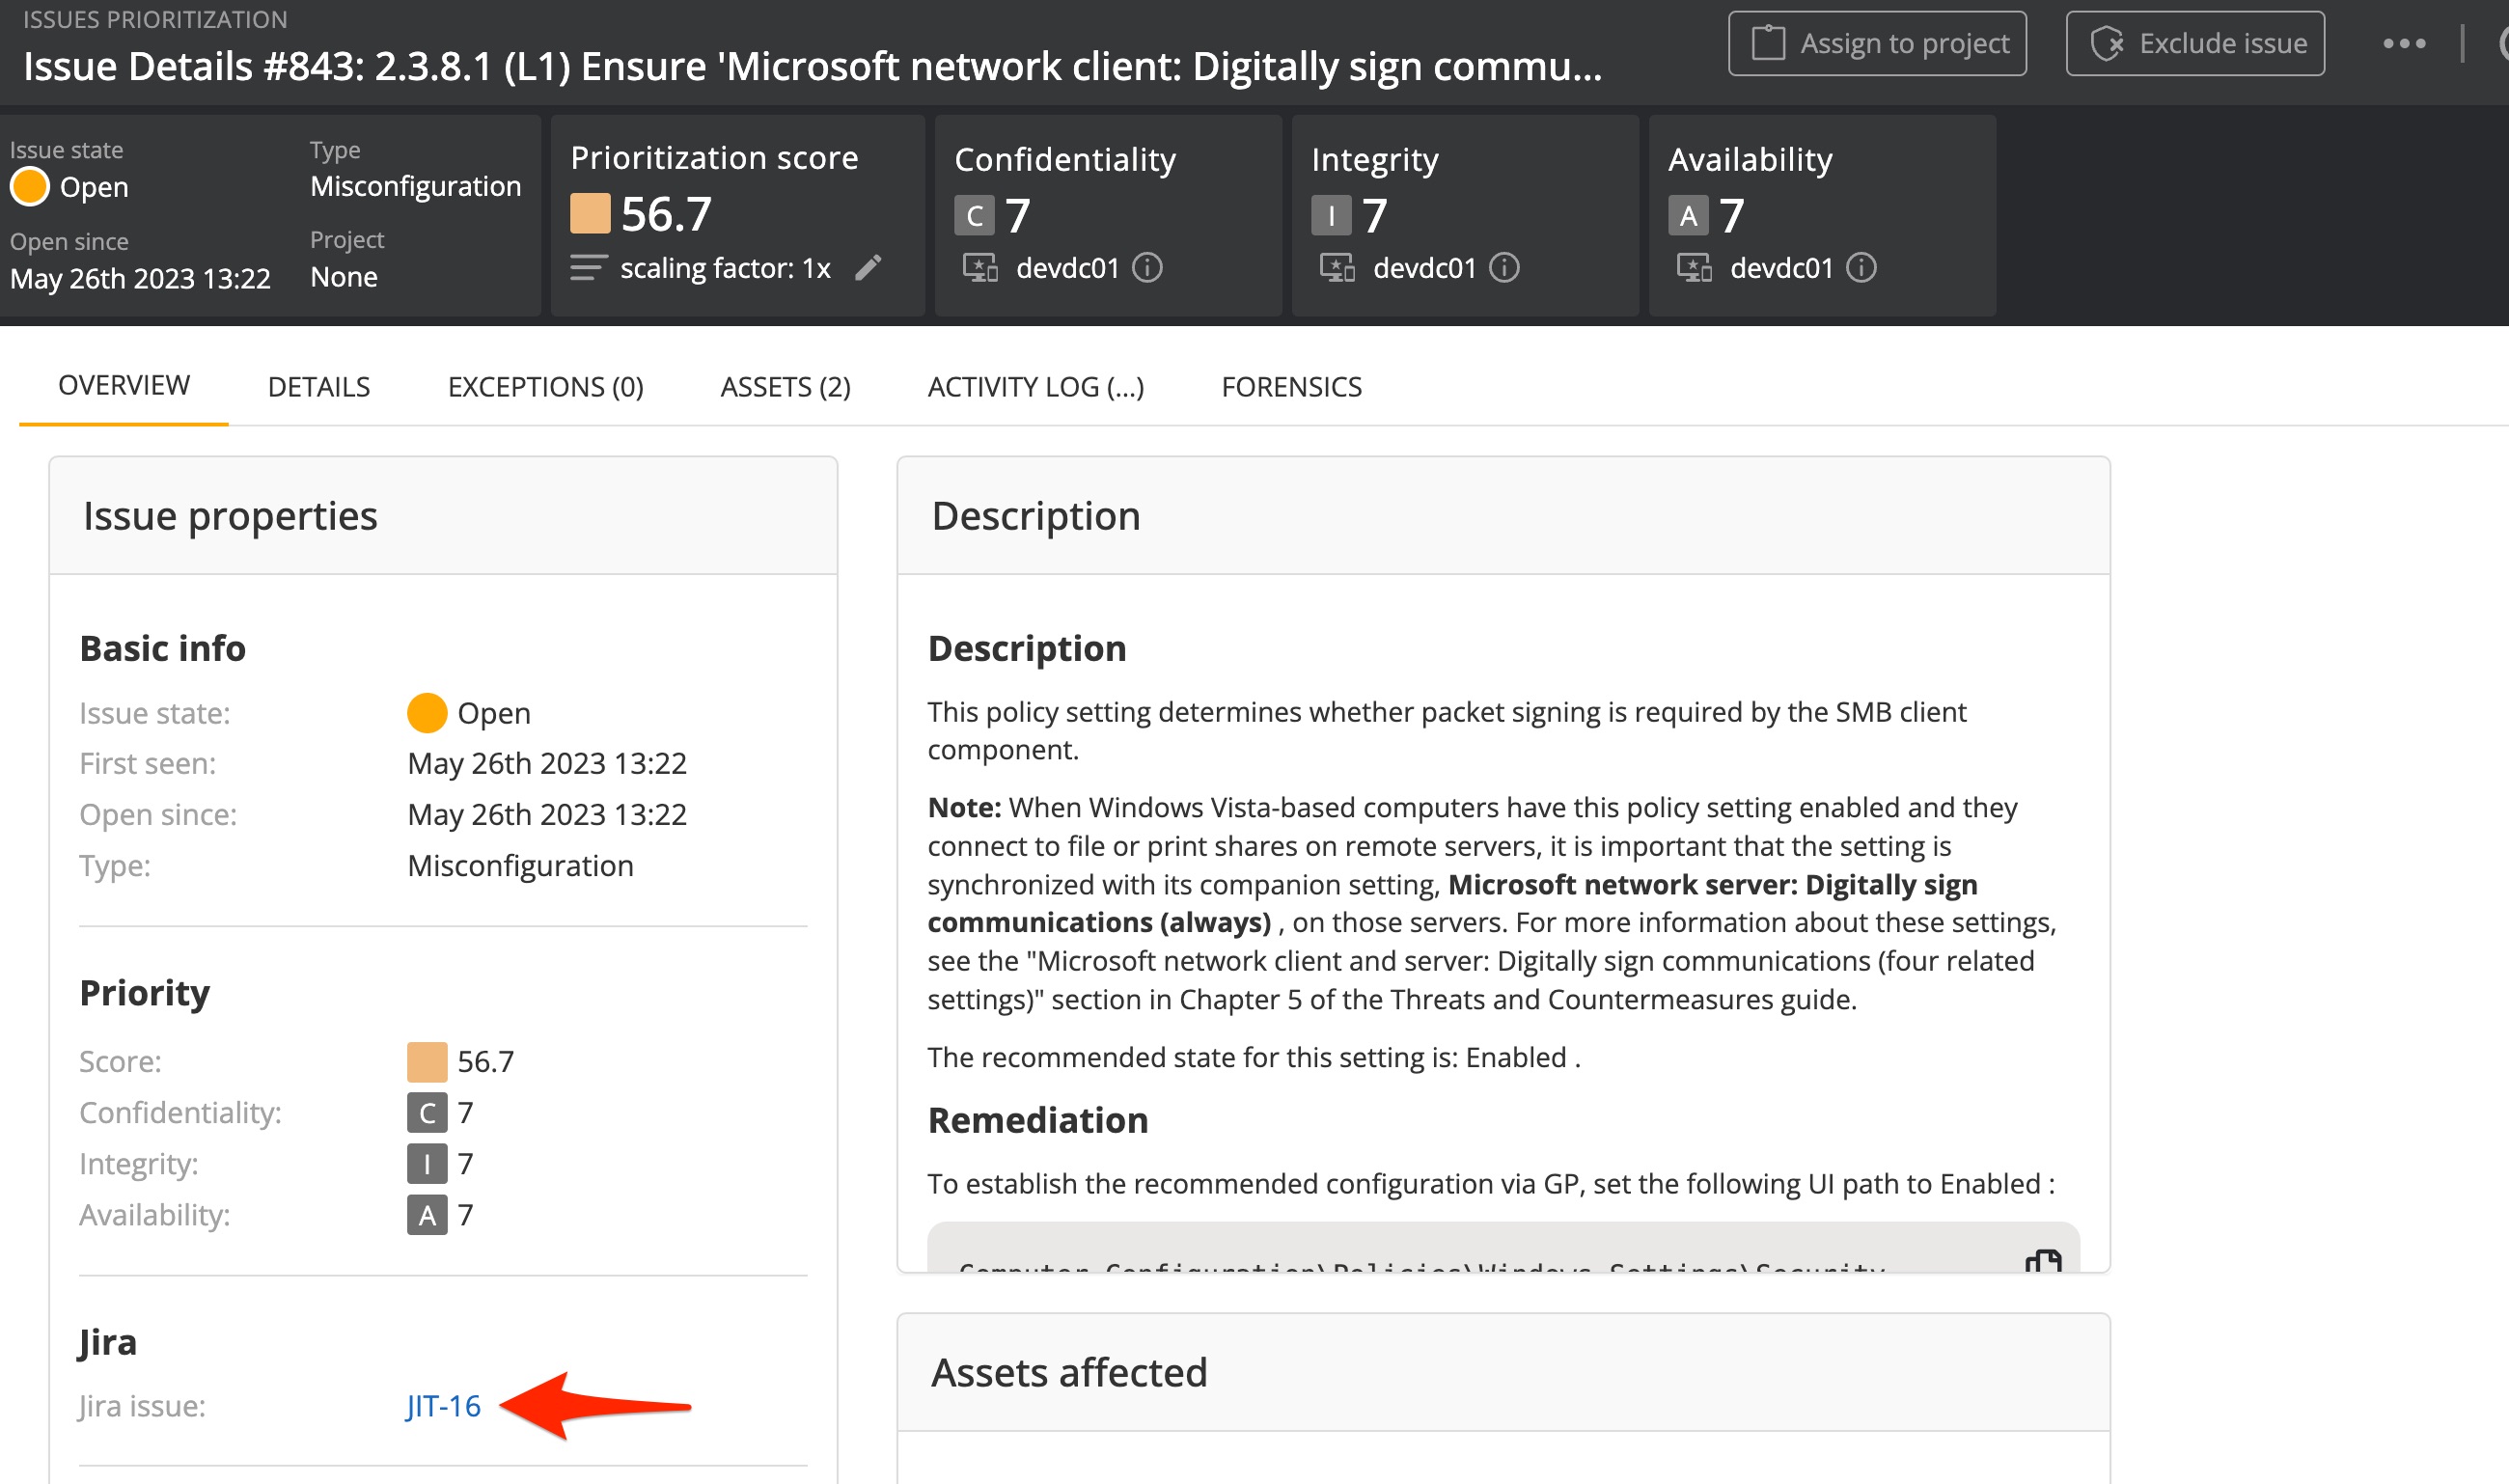
When successful, you will see the Jira issue key that has been given to the Jira issue you just created.
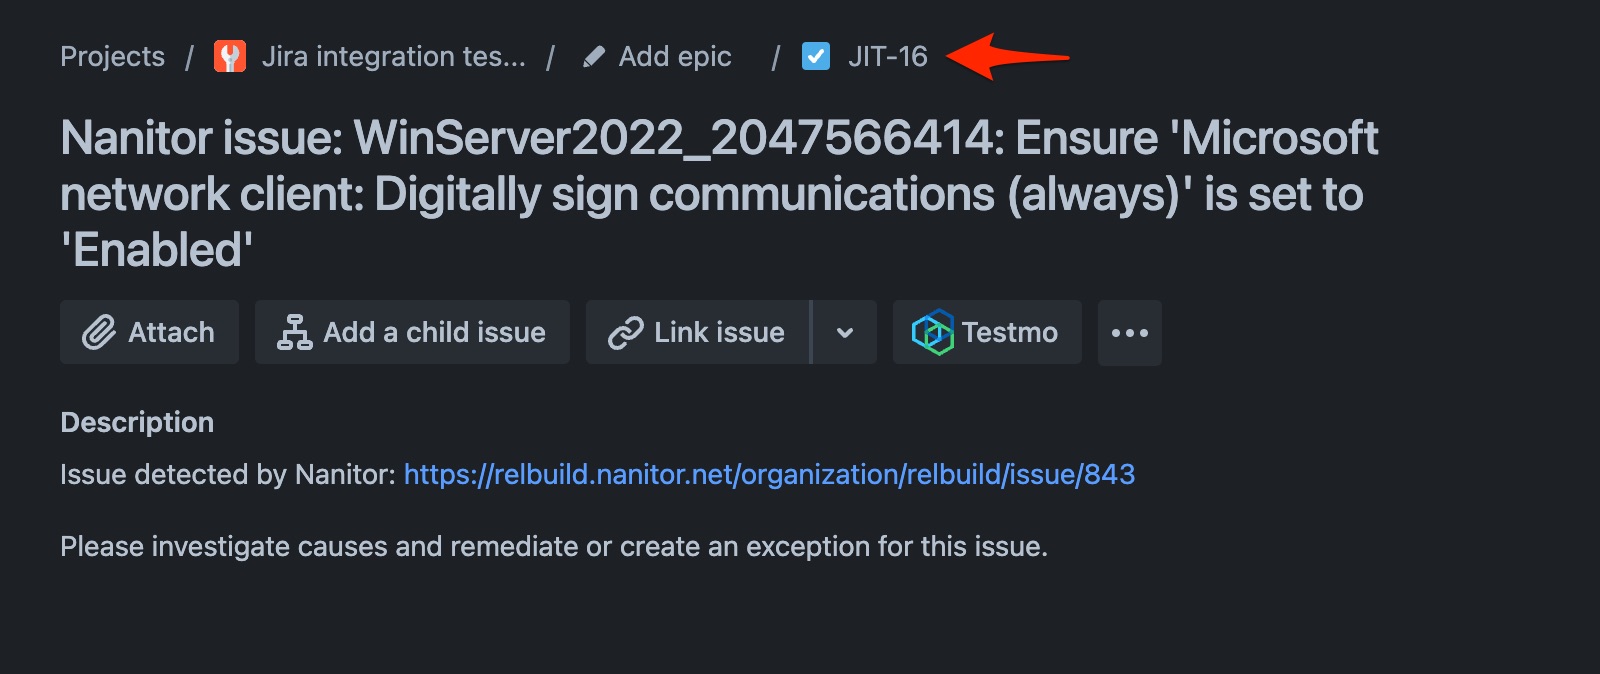
You can click on the link which will open the Jira issue view for the ticket you have just created from Nanitor.
